Discover things to do and where to eat in Costa del Sol, Axarquía, Spain

Discover things to do and where to eat in Costa del Sol – updated on 30 December 2022: Living semi in Andalucía brings me much joy in life and one of them is exploring interesting places on an easy pace across four seasons with sunshine almost all year round 😊. Most of the time, I combine my trips with a nice outdoor activity such as a village/city/beach walk or a nature hike and ending my day with a culinary experience.  

On this blog, you may not find tips on museum visits (only exceptional) or historical stories about the places I’ve visited. Nevertheless, I hope you will find something on this post that triggers your interest for your travel plans or maybe just find a nice restaurant for your day.

Most of my stay in Spain, I stay in Axarquía. This is a district of Málaga province in Andalucía on the east side of Malaga. Its name tracks back to Arabic meaning of “the eastern region” and covers the sunniest places on the east coast of Costa del Sol with an average of 320 sunny days a year. Axarquía is composed of 31 municipalities and I will share the places which I like or visit the most.

Towns and villages covered in this blog are: Frigiliana, Nerja, Torrox Costa, Torre del Mar, Caleta de Vélez, Vélez-Málaga, Salobreňa. More recommendations to be updated for Lake Viñuela, La Maroma.

Frigiliana

Frigiliana is my most favourite village so far which is also Spain’s most beautiful and well-preserved village.

  • Take a stroll in this picturesque village, explore the small streets with beautiful blue painted doors and window shutters, see colourful flowers in pots or pink bougainvillea growing on white walls that bring a heart-warming feeling. Ladies don’t forget to wear comfy shoes as the streets and alleys are charmingly cobbled in this village. Note that shops are often closed during siesta time (14-17pm) and in winters (Jan/Feb), some may be even totally closed having their winter break.
  • Prefer a guide telling you all the historic stories of this village? You can book a guided tour in English. Costs for an adult is €4. Check out for more information on this link www.frigilianatours.com
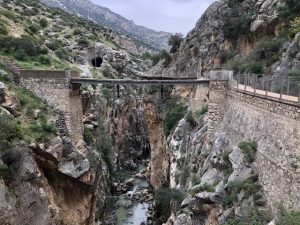
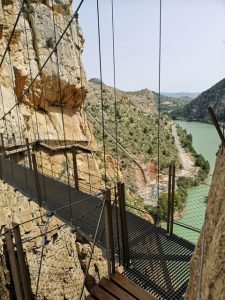
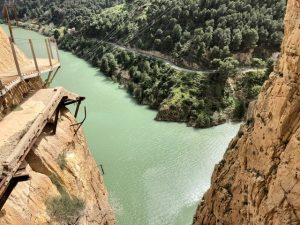
  • Want to go for a spectacular hiking route Rio Higueron and El Fuerte? This route takes you from the beautiful village of Frigiliana into the waters of the Rio Higueron following it upstream to near its source in the Carrascal. Find more about hiking routes in Frigiliana and in its Natural Park Sierras de Tejeda on this link.
  • Explore other activities on the official tourist office website for Frigiliana.
My favourite food places in Frigiliana:
  • Restaurante El Jardin – serves a range of fresh Mediterranean cuisine/Marrocan food. It has a divine terrace looking over Frigiliana village. To get there, it’s quite an uphill walk but worthwhile. Main dish approx. €20
Transportation

You can easily drive to Frigiliana by car from Nerja, it’s about 4km. There is one big parking garage, or you can park along the main road for free if there is a spot available. At high season, very unlikely to find something though. Taxi always possible.    

Another option is taking the bus that runs every hour between 07:20am until 20:30pm. Bear in mind, there is no bus service outside these service hours, also not on Sundays and not on public holidays. The bus departs from Nerja bus station. Ensure you have small bills/change to pay in the bus, one-way cost €1,20. For bus time table, please check here.    
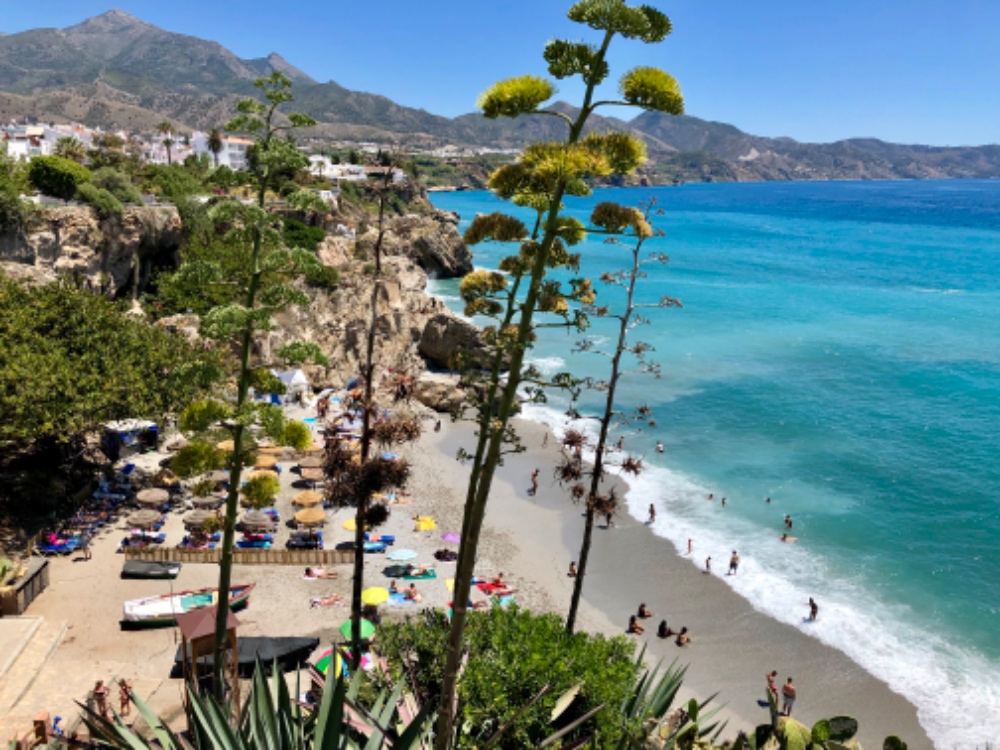
Nerja

Nerja is well known across Spain for its natural beaches, with many of its coves frequently featuring amongst the candidates for the best beach in Spain.

  • Balcón de Europa, undoubtedly the heart of Nerja (balcony square) with amazing sea and mountain views.
  • Nerja caves, one of Spain’s most popular and spectacular historical sites. Sometimes, they hold classical music concerts onsite. For the early birds, they offer limited free entrance for EU citizen from Monday until Friday, on the first opening slot at 09:30am. Check for reservation rules on their website.
  • Wet and wild hiking trail along (in) the river Rio Chillar. The river flows through Tejeda, Almijara and Alhama Nature Reserves. On your journey you will have the opportunity to bath in a natural gorge and waterfall. Be prepared that your shoes get soaked and bear in mind to wear steady walking shoes. Accidents has happened here and would be good to have urgent SOS numbers to reach out to.
  • For some beach moment, go to Burriana beach, it’s a cosy ‘posh’ beach with nice and modern restaurants. There are nice natural beaches along the coast nearby Nerja but bear in mind there are limited facilities. Access is often along the national beach road.
  • Tuesday market, located in Almijara II urbanization on the way up to Capistrano San Juan neighbourhood. They sell leather goods, textile, Spanish artisan pottery, spices, vegetable and fruit. Opening hours at 09:30-ish until 13/14:00pm. Take the Verano Azul blue bus from town, approx. €1.
  • Sunday Nerja Flea Market (also called as Rastro), find all kinds of second-hand items eg lamps, paintings, furniture, fabrics, clothing, books etc. Location is the same as the Tuesday market in Almijara II urbanization and starts from 08:30am until 14:00pm.
  • Explore other activities on the official tourist office website for Nerja.
My favourite food places in Nerja:
  • Spanish & seafood: La Marina Marisqueria. There are two types of seating areas. On the left side of the entrance is the tapas area. You can choose one free tapas from a designated list with each single drink you order. On top, you can also order dishes from the menu. On the right side, these are tables where you can order from the menu but no free tapas 😉. Tip – be assertive when you want to get their attention to place your food/drink order.
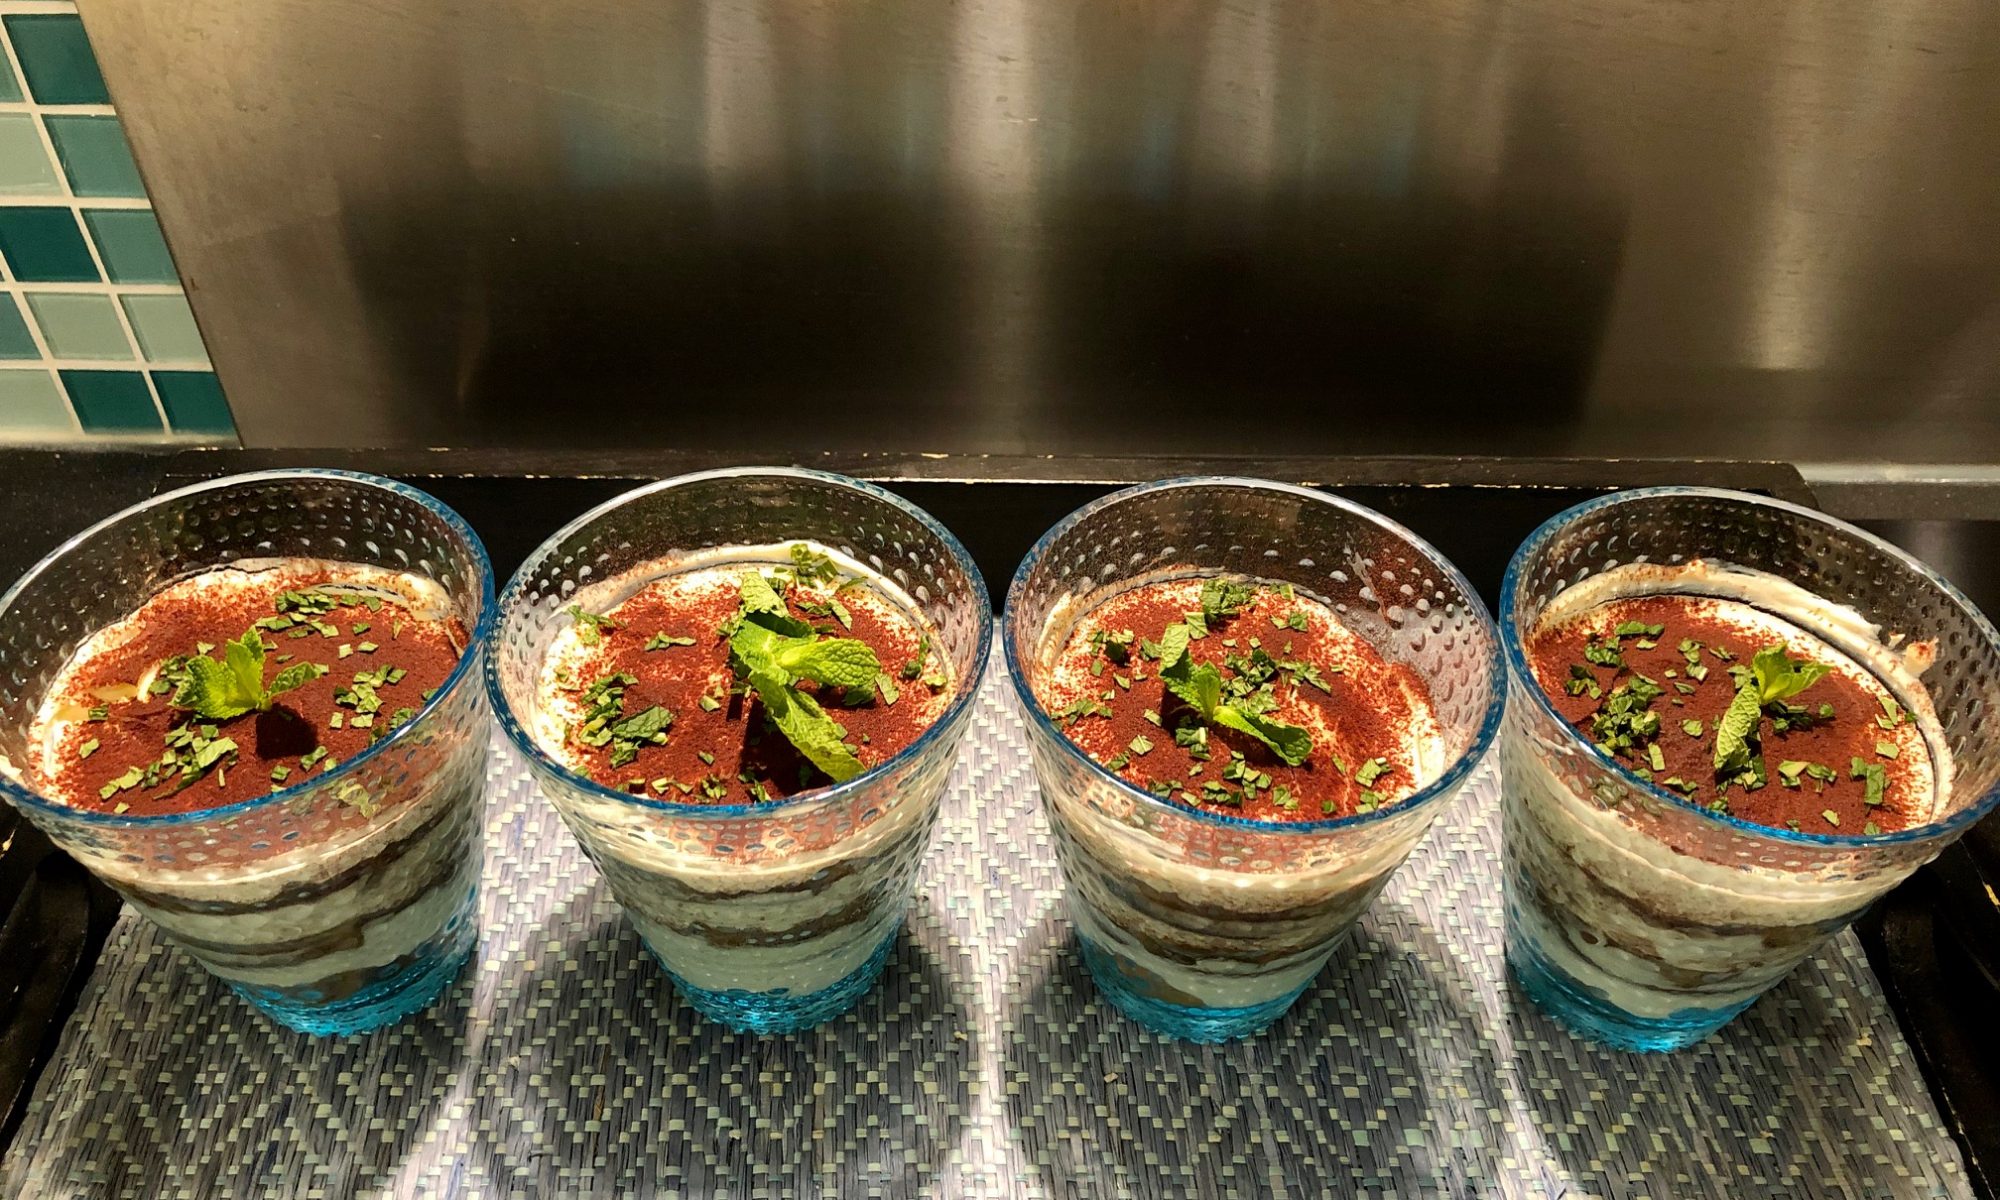
  • Italian: L’antica Nonna Mia. I highly recommend their fresh pasta dishes and tiramisu. Just superlicious and super value for its quality, price and quantity! On a nice sunny day, you can enjoy the surroundings at their divine terrace with sea view.
  • Italian: for a typical Italian style pizza, I would go to Vitaliano da Cristina (close to Nonna Mia and has a nice terrace with sea view) or go to Paparazzi.
  • For carnivores go to Posada de Iberica. I just love this place! Small menu, delicious food prepared with passion and all managed by a friendly man from Argentina. It’s a small cosy brown café style restaurant, a one-man show who serves quality food, good quantity and for a good price.
  • Prefer a trendy gastronomic experience with table settings and cosy atmosphere? Go to Fusion by Silvio Santogiacomo, Pápalo,  Restaurante Unico.
  • At Burriana beach, one of my favorite trendy gastronomic tapas place is RAW Lounge.
  • Do you like drinking cocktails? Go to Hemingway’s, I always go back to this place to get close to my cocktail standards. Wanna go for a nice holiday feeling with amazing rooftop views? Go to Terazza Buddha Lounge bar or the Volk’s Bar Sevillano (take the elevator situated inside Sevillano restaurant).   
  • For the best churros in town, I go to a simple local place at Café Bar las Cuatro Esquinas. They serve fresh fried churros between 09:00-12:00 noon and from 17:00-19:00pm. Chocolate lovers, order a cup of hot chocolate to dip in, you will not regret!
  • Breakfast: is your breakfast the most joyful meal to start with your day? Go to Parador Hotel, it isn’t cheap, ~€20pp but they serve an amazing buffet breakfast with a divine sea view on the terrace. They serve fresh orange juice, various bread, amuses, cheese/meat cuts, cereals, yoghurts, cold & hot platters and sweets and more to have a happy day.  
  • Like to enjoy your morning coffee with a nice sunny sea view? Go to Café Anahi, they have a small balcony terrace in the back with decent local prices in a top touristic location.
  • For a nice tea-time, I like to go to Mena Garden Nerja. It’s situated at the back of the hotel in a charming inner garden. Their carrot cake is delicious! Not too sweet of not overly layered with crème.
  • For good bread or pastry, especially their carrot cake, go to bakery Panadería Confitería Salvador Nerja.

Torrox Costa

Have a nice morning or sunset run or walk on the beach boulevard of Torrox Costa. This beach can be quite windy comparing to other beaches but gives an uber relaxing holiday feeling. The boulevard offers plenty of beach cafés and restaurants, and a nice simple breakfast menu for about € 5

  • Monday market next to Iberostar hotel building. They sell leather goods, textile, Spanish artisan pottery, spices, vegetable and fruit. Opening hours at 09:30-ish until 13/14:00pm.
My favourite food places in Torrox Costa:
  • For the best ice-cream in Nerja and neighbourhoods, I tried them all and this is in my opinion the best place for milky ice cream at Vistamar Helados Artesanos. Note that they are closed during the winter season, I believe from October until March. It could be that they are open for weekends with limited opening hours in March.
  • Spanish & Seafood: Marisquera Encinas, one of my favorite typical local places where Spanish families gather for a weekend lunch. The food is delicious! Highly recommend their creamy Russian salad, almejas, boiled gamba’s, shell fish conchas finas naturale, grilled fish, paella or soup rice meal – arroz con bogavante (local lobster) or arroz con carabineros (mix seafood with giant shrimps). If you want to lunch during Spanish time, after 14pm, I highly recommend you in booking a table in advance. Bear in mind, this is not a fancy place, tables are setup on the pedestrian street facing a busy road. However, the seafood is divine with local cosiness! Another nice place and has a beautiful terrace on the seafront boulevard is at Restaurante La Farola. It’s a very popular place among locals and tourist, a table reservation for lunch would be highly recommended. Especially on the terrace.
  • Spanish: restaurant El Tito Arenas, a hidden gem with a relaxed local atmosphere. Excellent service and delicious food at great value. Their back garden terrace is nicer than the street side. Highly recommend their entrecote and on Friday’s lunch time, you can pre-order arroz con bogavante dish for €9,5 pp. On other days, its minimum 2 persons order and cost more. For the latter, suggest a table reservation.  
  • Spanish: a little bit off from Torrox Costa boulevard, along the main road towards Nerja at the beach front, you have chiringuito Jose Jimenez 34. Great service and delicious paella! Pre-order your paella with your table reservation to avoid disappointment as they won’t make this for you when its busy. They have mix (chicken/seafood) or seafood paella. Cost ~€22 for 2 persons and lobster paella for €46,-
  • Breakfast or lunch: trendy small cosy place at Entre Vientos, close to the lighthouse with nice sea view. Craving for real German bread or torten (sweet pie)? Go to Wolfgang und Karina’s Backstűbel. They serve an amazing breakfast set for ~ €5,5 that includes excellent coffee, various bread, cheese/ham and jam, or add ~€1,5 for scrambled egg.
  • Craving for some good Belgium beer and good simple food? Go to Le Comptoir Belge. In my opinion, when a place serves good crunchy tasty fries, that’s the place to have a good meal! They have a nice terrace with sea view.
  • For gastronomic Spanish go to Restaurante Pata Negra Playa. Serves Spanish food in a modern twist with excellent quality and price.

Torre del Mar

A popular beach site for local tourists with nice chiringuitos (beach bar/restaurant) along the boulevard. This nice promenade goes all the way to Caleta de Vélez, approx. 4km.

My favourite food places in Torre del Mar:
  • Spanish: Chiringuito Casa Miguel, a nice trendy place with great service serving delicious grilled/fried seafood. In- and outdoor seating at the beach front.
  • Spanish & seafood: El Señuelo, a very popular place among the locals. They have a tapas seating area at the entrance or tables on the terrace (however facing a parking place) or indoors. Spanish lunch time in weekends (after 2pm), I highly recommend you booking a table in advance.

Caleta de Vélez

Take a nice stroll at the little harbour where all the sailing boats are docked and have lunch or a drink at one of those bar/ restaurants.

My favourite food places in Caleta de Vélez:
  • Spanish & seafood: Marisqueria Mani, popular among locals with decent prices. The fish is fresh and delicious!
  • Spanish & seafood: Chinchin puerto, a trendy posh place located opposite of the little harbour. Atmosphere is superb, food is good but prices are a bit high-end.

Vélez-Málaga

Take a very nice town walk along the alley’s, especially walking up to the fort (Alcazaba La Fortaleza). It’s quite uphill but you will get an amazing 360 view over the town and sea. This town still has preserved its local vibe. There aren’t many tourists here and this is what I like the most.

My favourite food places in Vélez-Malaga:
  • Spanish tapas bar: Restaurante la Gamba Dorada, this place offers a nice vibe with great services. You can choose one free tapas from a designated list with each single drink you order. What I most like about this place is, they offer a wide variety of red, white and rose wine per glass, so you don’t need to buy a bottle to taste the wine.

Salobreňa

A beautiful white village on the Costa Tropical, dominated by a hilltop castle from the Al-Andalus period. This castle transitioned from a Phoenician to a Roman site, then to an Arabic fortress and at last conquered by the Catholic kings.

  • Take a stroll in the old town, walk along the narrow streets and relax in tranquility.
  • Visit the fortress castle that offers a mixture of architecture from different periods. At the top, you will have a 360’ panorama view. At clear blue sky, you can even see Sierra Nevada.   
  • Don’t miss the beautiful beach that is at the bottom of the town. Take a nice stroll along the boulevard and enjoy a glass Tinto de Verano (soda mix with wine) or sangria.

More recommendations to be updated for Lake Viñuela, La Maroma.

Share this:

Japanese braised Kakuni Aubergine

Japanse braised Kakuni aubergine is soft with a savory and spicy flavour. I had this dish in a Japanese restaurant which I cannot forget, and they call it ‘eggplant nanban’. But after searching online for the recipe I got many different results that didn’t match what I ate at the restaurant.

I got so confused with the Japanese sauce or type of cooking methods like nanban, agebitashi and kakuni. After some research on these different cooking styles, here a brief summary on what each means.

Nanban means deep-fried and common accompanied with tartare sauce. Ingredient is usually deep-fried chicken in batter. Agebitashi means deep-fry and soaked in sauce or broth. Kakuni means stewed cube. Ingredient is usually pork belly cut into large cubes.

After some home cooking attempts and the flavours I remembered (well… I went back to the restaurant a few times), the closest style is Kakuni pork belly but then with aubergine. You can eat it cold or warm as appetiser. If you serve the aubergine cold, the flavours are denser and superlicious. For example, you can eat it with rice or as topping in your soup noodles.

Cooking time: approx. 30-45min and serves 5-6 persons

Ingredients & Tools

  • 6x Chinese aubergine
  • 6x Tbsp cooking sake
  • 6x Tbsp mirin
  • 3x Tbsp grated ginger
  • 4.5 Tbsp soy sauce
  • 150cl water
  • Optional: 2-3x thin sliced medium-hot chili
  • Garnish: sesame seeds and/or thin sliced spring onion
  • Olive oil
  • Grater
  • Frying pan 24-28cm diameter, not too big because you want to braise the aubergine in the sauce
  • Cut baking paper to use it as lid on the pan
  • Small medium bowl
  • Big bowl

What to do?

  1. ————- Aubergine ————-
  2. Peel the skin in ‘zebra stripes’ down the aubergine.
  3. Cut aubergine into 2-3cm cubes
  4. Soak the cubes in big bowl for 5min in cold or hand warm water. This is to decrease the bitterness of the aubergine.
  5. ———– Kakuni Sauce ———–
  6. Mix in bowl: 6x Tbsp sake, 6x Tbsp mirin, 4.5 Tbsp soy sauce, 150cl water, 3x Tbsp grated ginger and optional 3x thin sliced chilli
  7. ——— Cooking Process ———
  8. Cut the baking paper round, 3-4cm bigger than the pan size and cut a small whole in the middle.
  9. Heat the pan with a splash of olive oil.
  10. Put the cubes in the pan on low/medium heat.
  11. Pan fry the cubes, turnaround and sprinkle extra olive oil if needed
  12. Once your aubergine gets a bit soft, pour the sauce in the pan.
  13. Let it braise for 20min on low heat and cover the pan with the baking paper lid
  14. Turnaround the cubes from time to time during the cooking process.
  15. When the cubes are soft, near to mushy, it’s time to serve.
  16. Garnish with some sesame seeds and/or with thin sliced spring onion.

I hope you like this homemade Kakuni style aubergine, itadakimasu 😊

Share this:

Terrors of El Caminito del Rey and its magical nature

Terrors of el Caminito del Rey is a divine destination to visit. El Caminito del Rey (The King’s Little Path) is a walkway, pinned along the steep walls of a narrow gorge in El Chorro, near Ardales in the province of Málaga, Spain. This beautiful scenic walk is breath taking and brings more natural sights you can visit for a day. You can find other hiking trails and gorgeous blue lakes for a magical chill out.

How to plan your visit?

I suggest booking your tickets in advance as this attraction can be fully booked for months. We are fortunate with the Covid restrictions and could pay a visit without mass tourism. You can buy tickets online on their official website.

This hike takes about 2 hours in a stretch of 8km without a guided tour (guided is optional) and is a one-way walk from the northern point to the south, ending at the village El Chorro. We took our time in enjoying the nature and there are benches available where you can consume your sandwich at scenery spots.

Route El Caminito del Rey – The King’s Little Path

In general, the hike is an easy combination of walking on flat soil paths, boardwalks and steps. For those being afraid of heights, the boardwalk is about 1,5-meter width having a metal thread fence. Some boards have an opening of ~3cm in between, so flat solid shoes are highly recommended. I believe children under the age of 8 are not allowed to entry, please check the entrance rules on the website. Along the path there are staff keeping an eye on safety and protecting the nature.  

Car parking options:

You can park your car at the starting point or finishing point. If you choose for the latter, you can take the ‘Caminito del Rey bus’ that brings you to the starting point. The bus fare is €1,55 per person for a single trip and drives every 30min during operational hours. You can easily find the bus stop as there are clear signs on the streets. The bus ride takes approx. 20min. If you are lucky, you can park your car for free along the mountain road or find a spot in public parking spaces. Otherwise, you can park at the visitor center for €2 which is close to the starting point.  

How to find the starting point?

This was a mystery for all visitors, both to locals and foreigners. There are no clear route directions, neither clear information on the website on how to walk to the starting point. Take as reference on Google map ‘El Kiosko, Ardales’. This building has a restaurant, bar and a little kiosk and is located along the mountain road. On the right side of the kiosk, there is a tunnel. Pass through the tunnel and turn right on the path. There is a sign with El Caminito del Rey. The walk to the starting point takes approx. 20-30min. At the starting point, you need to queue for your entrance slot. Bear in mind, they do not sell entrance tickets here. Once you pass through the ticket scan, a helmet and a brief introduction on safety & rules will be provided in Spanish or English. What about toilets? No worries, you can find toilet facilities at the queuing area… but be sure you have your own ‘toilet’ paper 😉

I hope you will enjoy this beautiful walk and magical landscape!

Share this:

Tiramisu

Tiramisu, who doesn’t like it? One of my favourite desserts and it is simple to make. Superlicous and fancy for a dinner close out accompanied with a glass of digestive. I learnt making this dessert from an Italian friend. I slightly change the ingredients after making it multiple times and found my own right balance of sweetness and flavours. I hope you like it 🙂

Cooking time: approx. 30min and serves 4 portion

Tip:

  1. Make tiramisu 1 day before serving as it bring more flavour
  2. Replace lady fingers with cantuccini biscuits if you like trying out a different tiramisu texture

Ingredients & Tools

  • 250gr mascarpone
  • 2x egg white
  • 2x cups black coffee
  • 1x pack lady fingers, you might only need 4-5 fingers per glass
  • Cacao powder
  • Cacao spreader or use a sieve
  • Optional liquor: e.g. Tia Maria, Grand Marnier, Amaretto or Pampero rum  
  • Optional topping: e.g. fresh mint leaves, raspberries, blueberries, red berries, or chocolate flakes
  • Mixer
  • 4x water glasses
  • 1x big bowl
  • 1x small bowl
  • Tea spoon
  • Aluminium foil

What to do?

  1. ————- Prepare coffee mix & cream ————-
  2. Make 2 cups of black coffee and let it cool off with a splash of liquor in a small bowl. Be careful with pouring too much liquor as it can bring your tiramisu flavour out of balance. Leave out the liquor for alcohol free tiramisu.
  3. Mix at lowest stand 250gr mascarpone and 2x egg white until well mixed. The mixture might be a little stiff but no need to over-mix.
  4. Bring a splash of liquor into the mixture and continue mixing to a creamy consistence. If consistency is to fluid, you might need to add more mascarpone to get the right balance.
  5. ————- Layer the Glasses ————-
  6. Break the ladyfingers in line with the glass width size from bottom to top when you do each layer.
  7. Dip the fingers in the coffee mix, not too long and not too short. It should absorb enough coffee mix without falling apart. Layer the bottom of the glass first.
  8. Then layer with cream by using a tea spoon and gently smoothen it flat on the fingers.
  9. Spread a thin layer of cacao on the cream.
  10. Repeat step 6 until 9, until the glass is nicely filled upto 1 cm below glass top
  11. Cover aluminium foil on each glass.
  12. Chill the glasses in the fridge for at least 3 hours or overnight.
  13. Before serving spread an extra thin layer of cacao.
  14. Optional: chop mint leaves to fine flakes and sprinkle a little bit on top of the tiramisu. Finishing touch by putting a full mint leave on top.

Share this:

Snack less and spread during the week

New year, new resolutions and I definitely need to slow down with snacking 😅. Home working for almost a full year and not able in loading off your stress with social engaging in a nice bar makes life so much challenging now!

More days are becoming in reaching out to comfort sweets which brings happiness for a moment but then when I look in the mirror…. hmmm, I think I must reduce some sweet treats.

Starting from February, only on Tue/Fri/Sat and only if I have hard craving for sweets.

Together, we can motivate each other and then we might have a better chance of succeeding. And because today is Tuesday, Johan is baking his 1st Swedish Semlor for our treating day 😋. If you bake or buy your sweets, try to get some baby versions so that you have the option to choose and eat a smaller piece.

Semla (plural Semlor) is a Swedish delicious pastry. The dough is kneaded with crushed cardamom seeds, the center is hollowed out for almond paste filling and topped with fresh cream.

Happy Fika and grab a nice coffee with it, enjoy!

Share this:

Swedish Finnish Sticks and Raspberry Caves

Don’t know why they call it Finish sticks but they are superlicious origin Swedish pastries. These cookies taste like butter cookies and are very simple to bake. With the same batch of dough I will bake Finnish sticks and will also make Raspberry Caves for some deli variation. If you prefer one type, then you can skip the other ingredients.

Baking time: 20-25min + 30min dough resting time, serves approx. 40-50 cookies

Ingredients & Tools

  • 200gr butter on room temperature
  • 1dl sugar or lesser
  • 1Tblsp vanilla sugar
  • 4,5dl all purpose flour
  • 1x egg
  • Optional: handful pearl sugar
  • Optional: handful crushed almond nuts or any that’s your favourite 
  • Optional: raspberry jam or any jam you like
  • Baking paper and baking tray
  • 1x big bowl
  • 1x baking brush
  • 1x teaspoon
  • 1x fork

What to do?

  1. Put all ingredients in one big bowl. Knead by hand or in a baking machine until its smoothly mixed. By hand it takes between10-15min. 
  2. Split the dough in 2x plastic bags eg sandwich bag and flatten the dough.
  3. Put the bags in the fridge for 30min.
  4. Pre-heat oven on 175°C at conventional heating (oven symbol stripe on top and bottom).
  5. Beat the egg in a small bowl with a fork to use as egg wash for later.
  6. Take the dough out of the fridge. Break a piece and make a ball with your hand palms.
  7. ————- Make Finnish Sticks ————-
  8. Roll the dough on finger thick size strings. 
  9. Cut stick pieces for about 4cm width.
  10. Brush a bit of egg wash over the stick pieces.
  11. Mix the sugar pearls and crushed nuts together (or use one of the two ingredients) and layer on the stick pieces.
  12. Put the sticks on the baking tray.
  13. ————- Make Raspberry Caves ————-
  14. Roll small balls for a cookie size and press a whole in the centre with your dumb.
  15. Scoop a bit jam with the teaspoon in the cookie centre.
  16. Egg wash is not needed here.
  17. Put the cookies on the baking tray.
  18. ————- Cookies in Oven ————-
  19. Bake for 9-10min in the middle of the oven.
  20. Cool off for at least 30min.  

Enjoy your coffee & tea time with your delicious home baked fluffy Swedish cookies 🙂

Share this:

Swedish Cardamom Cinnamon Bun

Do you like coffee & tea time too? Cardamom buns are an indispensable delicacy among Swedish folks for Fika time. Taking your time for a good coffee or tea and have sweet delicacies. This spiced Swedish bun has an intense floral perfume from cardamom seeds, which works its way into the dough during cooking. Another favourite is the cinnamon bun, where the baking process is the same but having cinnamon as key flavour.

This recipe covers both, a mix of cardamom and cinnamon but having cardamom as the key flavour.

Serves approx. 20 buns, baking time 1:30-2 hrs including rising process.

Tips:

  • Flour: use bread flour (hard wheat flower with gluten) or strong flour that contains more protein (tarwemeel/speltmeel) which gives an elastic texture. Do not use all-purpose flour (self-rising flour) as this contains baking powder and is intended for non-yeast recipes e.g. cake and muffins.
  • Yeast: use yeast in the recipe and not baking flour 
  • Cardamom in dough: do not use powder version. If you have pods, then prepare this first in taking out the seeds of the pods as this is quite an effort and time consuming.
  • ————- The Dough ————-
  • Saucepan
  • Whisk
  • Big bowl
  • Mortar & pestle
  • Dough mixer 
  • Kitchen towel
  • Dough roller / rolling pin
  • Knife
  • Baking paper, baking tray
  • 2,5 dl milk
  • 25 gram yeast
  • 1 Tbsp fresh ground cardamom seeds
  • 450-500 gram (7dl) bread flour 
  • 75 gram butter on room temperature  
  • 1 dl sugar
  • ½ tsp salt
  • ————- The Filling ————-
  • Small bowl
  • Fork
  • 100 gram butter on room temperature, butter needs to be soft
  • 1dl sugar
  • 1 Tbsp fresh ground cardamom seeds
  • 1 Tbsp cinnamon powder
  • ————- Topping ————-
  • Baking / pastry brush
  • 2x small bowls
  • 1x egg wash
  • ½ dl sugar
  • ½ dl water
  • ½ Tbsp vanilla sugar
  • Mix 2 tsp cinnamon and 2 tsp cardamom powder
  • Optional: 1dl pearl sugar or chopped almonds

What to do?

  1. ————- The Dough ————-
  2. Warm up 2,5 dl milk in a saucepan to finger warm temperature.
  3. Crumble 25gr yeast into the pan, whisk until it dissolves in the milk and pour the milk over in the big bowl.
  4. Grind 1 Tbsp cardamom seeds with the mortar & pestle.
  5. Add the grinded cardamom, 1dl sugar, 450gr baking flour and 75gr butter into the milk bowl.
  6. Mix the mixture for at least 15min until the dough gets elastic. Halfway mixing the flower, add ½ tsp salt and continue mixing. Add a bit more flower if dough is too wet.
  7. Cover the bowl with a kitchen towel and let it rest for at least 40min. The dough will rise about double its size.  
  8. ————- The Filling ————-
  9. Mix 100gr butter, 1dl sugar, 1 Tbsp ground cardamom and 1 Tbsp cinnamon powder with a fork. The consistent is difficult to mix in the beginning but when the butter softens, it will make it much easier.
  10. ————- Prepare Dough ————-
  11. Prepare baking trays, having baking paper on the bottom.
  12. The dough is ready when it bounces back by slapping on the dough with your hand palm or fingers. Place the dough on a flat and clean surface. Roll it out to a rectangular shape by using a dough roller. 
  13. Spread the filling in lengthwise on one half over the dough and fold the dough in half lengthwise.
  14. Gently, press the dough down so that the folded dough sticks together.
  15. Slice the dough in 1,5cm strips.
  16. Take one strip and twist it. Lay one end on the surface, then roll the strip over the end and place the other end at the bottom of the bun. See video on the ‘How’ at the bottom of this article. Place the bun on the baking tray.
  17. Repeat with the stripes and twists until dough is finished.
  18. Cover the bun tray with a towel and let it rest for 30min.
  19. Pre-heat the oven on 225°C.
  20. ————- Topping ————-
  21. While the buns are resting, make the sugar syrup. Put ½ dl sugar, ½dl water, ½ Tbsp vanilla sugar in a saucepan. Let it simmer until the sugar is dissolved.
  22. Whisk the egg for the egg wash (beaten egg + little water or milk).
  23. Brush the buns with egg wash.
  24. Sprinkle a little bit of the cinnamon & cardamom powder mix on each bun
  25. Optional: sprinkle a little bit of pearl sugar or chopped almonds on each bun.
  26. ————- Finally ————-
  27. Bake the buns in the middle of the oven for approx. 8-10min until the buns are having a golden glow.
  28. When you take the buns out from the oven, immediately brush each bun with a little bit of sugar syrup. The liquid will evaporate and don’t brush too much as you don’t want soggy buns. The syrup prevents having dry buns when they cool off.
  29. Let the buns cool off on the rack.
How to curl your bun

Enjoy your buns with Swedish Fika Time 😋☕️

Share this:

DIY ceiling fan installation, super woman or empowered woman?

Easy peasy, installing a ceiling fan isn’t it? The last few summers in the Netherlands has been very hot and I can’t bear it any longer, especially when you need a good night sleep for the next day. I had to find a solution and being prepared for the next summer. I spent hours online in finding an aesthetic fan with low decibel and a qualitative product for less than €350. Finally, I made my choice on an American product having more than 120 positive reviews and a star rating of 4,5 out of 5 but there is a ‘BIG BUT’. Every single review complains about the installation and the provided instructions. I got in big doubts if I should do it myself or just wait for my man. 

As I am a very independent woman since childhood, I wouldn’t call myself a feminist but I just like to prove myself that ‘I can do it’! So, I ordered the fan with 60 days return guarantee in order to buy time in case the job needs to be fixed by a man if my installation attempt fails.  

I clocked the time from the moment I switched off the electricity. Got my tool kit and my ladder and started with de-installing my bedroom light first. Straight after, I had my 1st challenge with the mounting plate installation. The screw distance didn’t fit with the ceiling mounting box, a shortage of 1,5 cm. I don’t want to drill holes in my ceiling, so I went to a small local hardware store and seek for a solution. 

Yes! I am saved for the 1st base 😁. Many thanks to one review I found to use an intermediate plate. I had no idea what it was and how it works! After seeing the solution, it makes sense. Terminology in the handy world is a riddle to me but luckily it solved my problem. 

Then the puzzle continued with the instruction book. It was tricky and very challenging to understand on what to do exactly. The guidance came with 26 languages including Dutch. Struggling and sighing through the pages, reading in Dutch as well in English, the pictures and instructions are just not obvious. After a while, all the colourful threads are finally in place. Lifting up 8kg motor mechanism and making sure all the threads and remote receiver fit in that tiny hood….. that was a hell of a job! I am halfway and it took me 2hrs of effort. 

Once the fan was installed, somehow there was no connection with the receiver and the light switch turns the fan on in its full power. Hmmm, something went wrong and I had to sort out what to do. After re-wiring the fan finally works, it took me 3:15 hrs of effort and decreasing patient! Next time, I’m sure I can beat my record 👍🏼

Share this: