Asian stir-fried vermicelli rice noodle dish, quick and easy

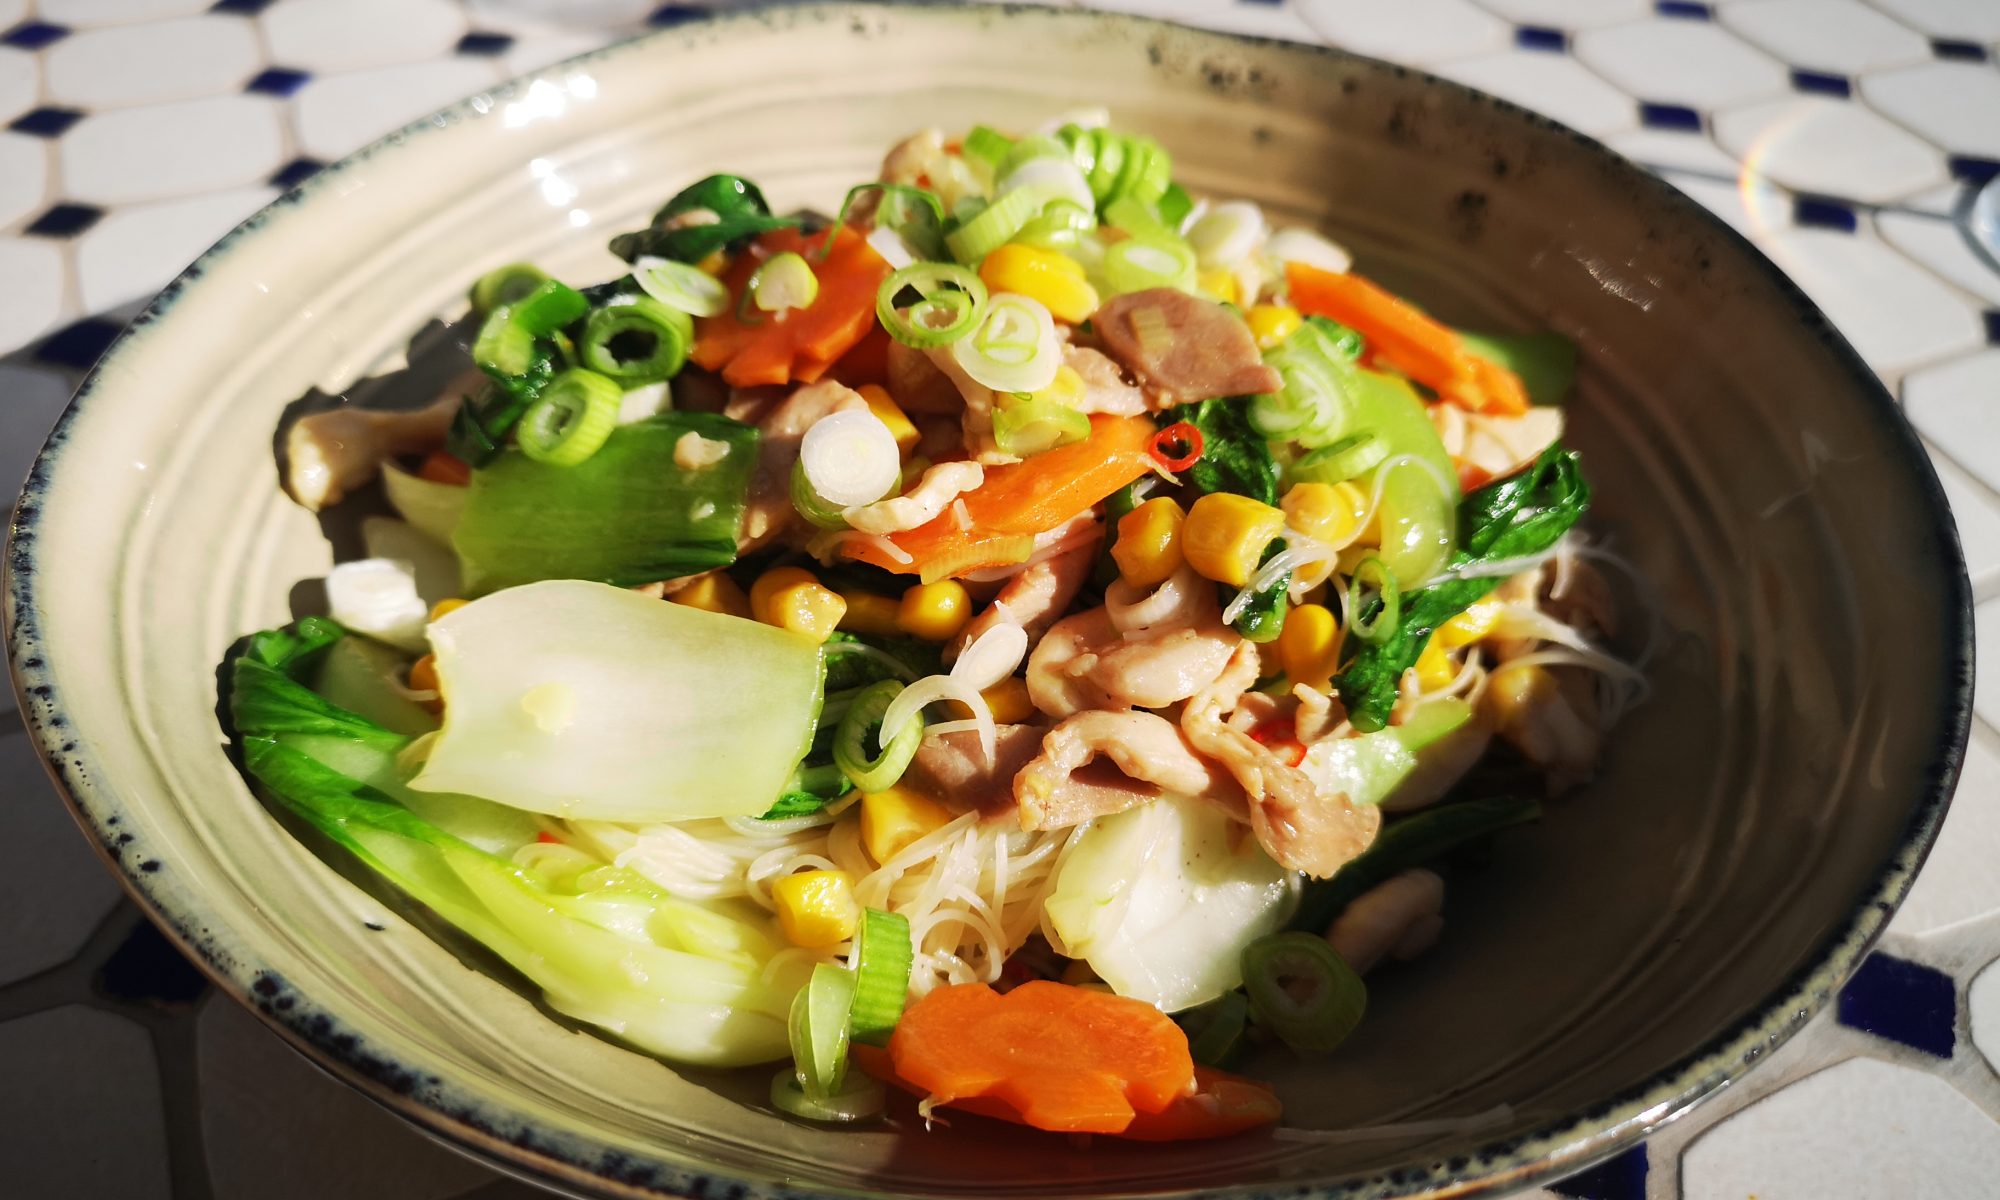
Asian stir-fried vermicelli rice noodle dish is quick and easy to make within 30minutes. I make this dish often when I don’t have much time to spend in the kitchen and have cravings for a delicious Asian noodle dish.

Ingredients to use can vary on what you have in the fridge. Meat ingredients can be chicken, pork tenderloin, frozen/left-over roasted duck or shrimps. Main vegetable can be Chinese bok choy (there are different types and each type can be used in this stir-fry dish), kai-lan or easier to get from the supermarket is bimi, broccoli or tauge (bean sprouts). Side vegetables can be carrot, canned sweet kernel corn or baby maize and spring onion for the finishing touch.

Cooking time: approx. 30 minutes for 2 persons

 Ingredients & Tools

  • 250gr chicken thigh filet – I like to use chicken thigh or roasted duck meat
  • 100gr rice vermicelli – I prefer the brand Wai Wai because of the refine texture but any will do
  • 2x stalk shanghai baby bok choy
  • 1x carrot
  • 1x garlic clove
  • Optional: 1x chili
  • 2x stalk spring onion
  • 70gr canned sweet kernel corn
  • Seasoning: sesame oil, soya sauce, white pepper, salt
  • Oyster sauce
  • (Extra virgin) olive oil
  • Big frying pan
  • Bowl for marinating the meat
  • 2x spatula
  • 2x sieve

What to do?

  1. ————- Soften the vermicelli ————-
  2. Soak the vermicelli in cold water until it gets a little bit soft. Optional is to cut the noodle in approx. 10cm length, this makes it easy to stir in the pan and to eat. Drain the noodle in a sieve and makes sure it’s almost dry before you cook, otherwise it will become a moisty noodle dish. You can drain the noodle a few hours before cooking.
  3. ————- Cut the meat ————-
  4. Remove fat and slice the chicken in thin slices and put in bowl. If you use roasted duck, slice this in slices, not too thick and not too thin. You don’t need to marinate as the roasted the duck is marinated and pre-cooked.
  5. Put 1 tbsp sesame oil in the chicken.
  6. Put 1 tbsp soya sauce in the chicken.
  7. Put a pinch of white pepper and salt, and mix the marination in the chicken.
  8. ————- Cut the vegetables ————-
  9. Cut the bok choy in bite pieces. Rinse in water and drain in a sieve. Important is to dry the vegetables as much as possible, otherwise it will become a moisty noodle dish. You can wash it a few hours before cooking or dry it out with kitchen paper.
  10. Peel the carrot skin and cut in thin slices.
  11. Chop the garlic fine or use a garlic presser. If the latter, only do this when you start cooking.
  12. Optional: slice the chili in thin slices. Keep the seeds as well if you like a spicy punch.
  13. Slice the spring onion.
  14. Drain the liquid from the canned corn.
  15. ————- Start cooking ————-
  16. Heat the frying pan and put 3tbsp olive oil. Do not overheat the oil in the pan.
  17. Fry the garlic in the pan to light brown and add half of the chili slices.
  18. Start frying the chicken until cooked and put it back in the marination bowl. Keep the oil as much as possible in the pan.
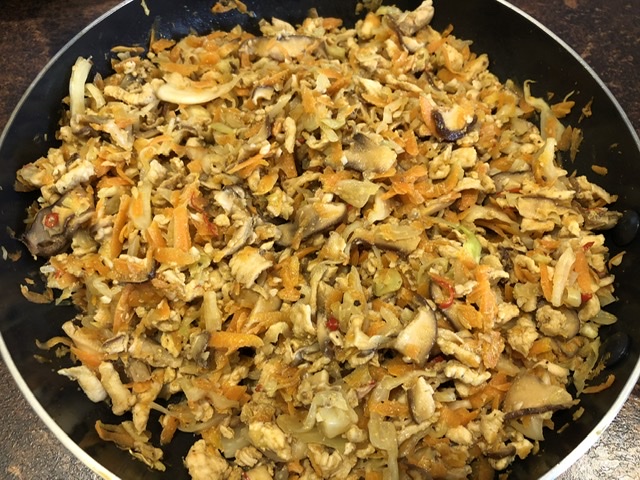
  19. Stir-fry the bok choi in the pan, first the white stalks and later the leaves together with the carrots and corn. The stalks take a bit longer to cook than the green leaves. Don’t cook the vegetables too long if you like veggie crunchiness.
  20. Then move the vegetables on the side of the pan or make a whole in the middle.
  21. Put the vermicelli in the pan, half of the slices spring onion and stir it together with the vegetables for about 1 minute.
  22. Put 2 tbsp oyster sauce, a pinch of salt and stir everything in the pan for a very short time and serve it on the plate.
  23. Sprinkle the remaining spring onion over the noodle as finishing touch.

Hope you enjoy this easy vermicelli dish 😊

Share this:

Asian Fried Spring Rolls

Asian fried spring rolls are one of my favorite food. Spring rolls are a large variety of filled, rolled appetizers or dim sum found in East Asian, South Asian, Middle Eastern and Southeast Asian cuisine. The name is a literal translation of the Chinese chūn juǎn (春卷 ‘spring roll’).

In Chinese cuisine, spring rolls are savoury rolls with cabbage and other vegetable fillings inside a thinly wrapped pastry and are usually eaten during the spring festival in mainland China, hence the name. Meat varieties are also popular such as with pork, chicken or shrimps. Every culture makes their own variety of ingredients which make this appetizer so diverse and special.

My recipe is with chicken, but you can replace that with something else or just stay with a delicious vegetarian bite. If the latter, prepare with more vegetables and vermicelli.

Each time, I make a batch of unfried rolls and freeze them in for a next snacking moment. This would save me a lot of prep-time when I’m craving for an Asian crispy fried spring roll 😊

Cooking time: approx. 2hrs and serves ~15 rolls, including cool off time.

Tip:

  1. Make a batch and freeze unfried spring rolls in the freezer. You can fry frozen rolls easily and it taste like freshly made.
  2. Buy your dipping sauce or make it homemade: spicy sweet chili, soy sauce & rice vinegar or Vietnamese nuoc cham (fish sauce).  

Ingredients & Tools

  • 250gr chicken (thigh) filet or ground chicken meat
  • 8-10x shitake mushroom
  • 2x garlic clove
  • 2x medium size winter carrots
  • 4x stalk spring onion
  • 1–2 chili, depends on if you like a spicy punch to it
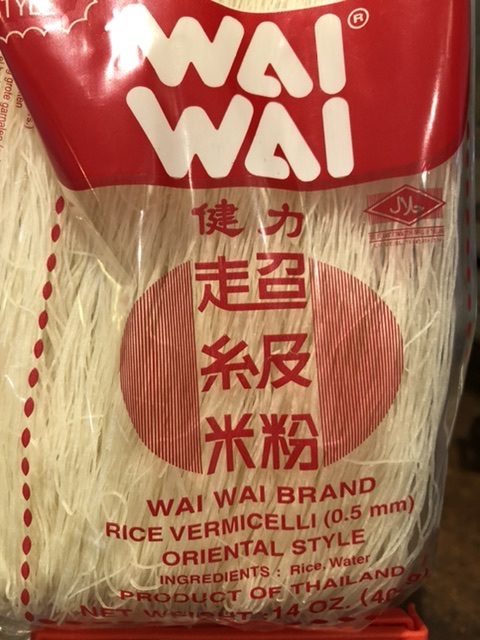
  • 100gr or 1 piece rice vermicelli, you can buy this in an Asian store.
  • 1x egg white
  • Seasoning: sesame oil, soy sauce, pepper, salt
  • Optional: romaine lettuce to wrap spring rolls for a refreshing taste
  • Sweet chili sauce for dipping
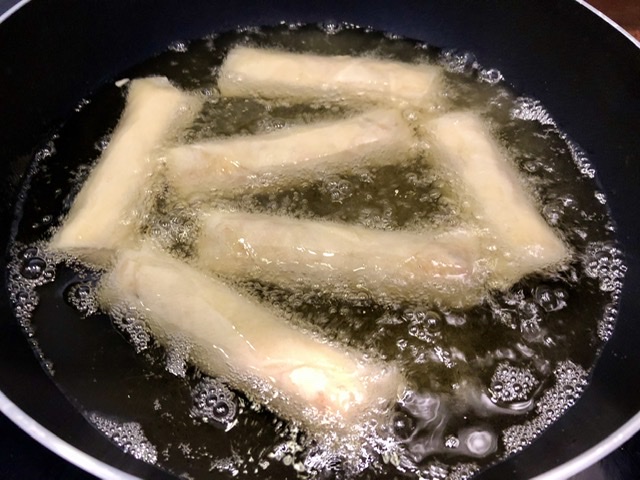
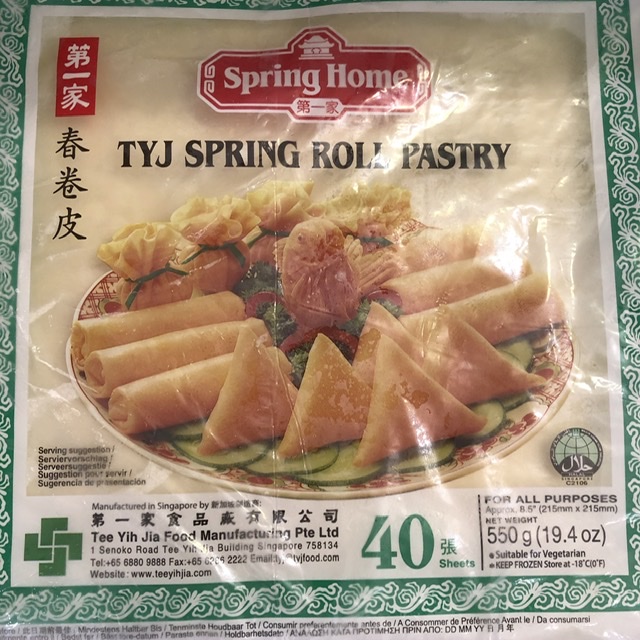
  • Spring roll pastry sheets ~20x20cm, you can buy this frozen in an Asian store. Unfreeze the pack and try splitting the pack in batches or in half. Use 1 batch and put the rest back in the freezer for the next time.
  • 0,5 – 1 litre sunflower oil, depends how big your deep fry pan is. No need to fill it up, you just need a layer for about 5 cm up from the bottom.
  • 1 big bowl
  • Grater for carrots (thin slice grater)
  • 1 big frying pan
  • 1 big pan to deep fry
  • Frying plier or long chop sticks
  • Sieve
  • Deep bowl and kitchen paper
  • To keep extra spring rolls in the freezer, required: airtight bags or box and baking paper.

What to do?

  1. ————- Soften the vermicelli ————-
  2. Break the vermicelli in ~4cm length and soften it in hand warm water until it gets a little bit soft. Then drain it out in a sieve.
  3. ——–Cut ingredients & Pan fry ——–
  4. Cut the chicken filet in very thin sliced pieces (simpler way is to use ground chicken meat) and put in the bowl. Personally, I like to use chicken thy because its more tender.
  5. Season the chicken with a sprinkle of soy sauce, sesame oil, pepper and salt.
  6. Chop mushrooms in thin slices. Put in the bowl.
  7. Mince 2 garlic cloves. Put in the bowl.
  8. Grate 2 carrots. Put in the bowl.
  9. Slice the spring inion and put in the bowl.
  10. Optional: slice the chili very thin and put in the bowl including the seeds.
  11. Mix all ingredients in the bowl and add a pinch of salt.
  12. Pan fry all ingredients on medium heat until the chicken is cooked. Then switch off the heat.
  13. Mix the vermicelli in the pan to make it softer by the heat.
  14. Let the ingredients cool off in the pan.
  15. When its cooled down, scoop the ingredients back in the big bowl.
  16. ————- Start rolling & Heat the oil ————-
  17. Beat 1x egg white.
  18. Heat the sunflower oil at the lowest stand.
  19. Take a sheet, put a layer of ingredients close to a corner and start rolling towards to the opposite corner. Important is to roll the ingredients tight in the sheet and there should be no empty spaces in between. Use the egg white as glue by closing the sheet end. Watch the video here on how to roll a spring roll.
  20. Storing spring rolls in the freezer: layer the rolls on a baking sheet with at least ½ cm distance from each other, the sheets should not touch each other. When you lay an extra layer on top, put a baking sheet between the layers. This is to avoid spring rolls sticking on each other.
  21. Put a kitchen paper sheet in a deep bowl. This is to drain out the oil after frying.
  22. Heat the oil up until you see little bubbles in the oil. Lower the heat stand a little bit, the oil must not overboiling.
  23. Gently put the spring rolls one by one in the oil pan. Do not fill the pan full as you need some space in turning the spring rolls with a frying plier or chop sticks.
  24. Fry the spring rolls until the sheet is hard and light brown, approx. 3min each side.
  25. Take the spring rolls out of the pan and let it drain upright in the deep bowl
  26. Leave it for 3-5 min and layer the spring rolls flat on a plate.
  27. ————- Ready to Eat ————-
  28. Dipping sauce, most simple is to have a bottle of sweet chili sauce at home.
  29. Wrap a spring roll in a lettuce leaf, dip it in the sauce and bon appetite.
Share this:

Sticky aromatic rice dumpling Zhong

Sticky aromatic rice dumpling Zhong is a delicious festive snack. My mum made these little treats when it was “Dragon Boat Festival” which falls each year on the 5th day of the 5th month of the lunar calendar, approx. late May to mid-June.

On Wikipedia, there is a great write-up about the tradition of making Zhong. In short: this Chinese historical event began with the Duanwu Dragon Boat Festival and the making and eating of zong zi are seeped in love.  A loyal senior state office named Qu Yuan (340-278 BC) of the kingdom of Chu spoke out to his leader about his truthful views about how to lead the kingdom.  However, others were jealous of him and turned the leader against him.  Qu Yuan was banished and eventually the kingdom fell to outsiders.  Qu Yuan, in his grief, committed suicide by jumping into a river.  

The common people loved Qu Yuan so much that they rowed out to try to find the body.  When they could not find it they wrapped rice with bamboo leaves and threw it into the river to distract the fishes from eating the body.  And thus began this now ancient yearly love memorial from the Chinese people:  the dragon boats racing through the rivers and the wrapping of the bamboo rice dumpling.  

Zhong (in Cantonese), is a Chinese traditional festive food made of glutinous rice with different sweet or savoury fillings wrapped in bamboo leaves. After being cooked in water, all the ingredients stick together and stay in a particular shape when unwrapped. In the Western world, they are also known as rice dumplings or sticky rice dumplings.

This aromatic and flavoursome treat involves a tremendous effort and specific preparation but definitely worth than buying as the ingredients you use at home are better in quality and in taste. The filling used and wrapped shapes varies from region to region.

I make my Zhong on my preferred ingredients which does not come from any specific region… at least I think. It’s all about what you want to eat right 😊

First time making Zhong might take quite some effort and time in tying the Zhong in the bamboo leaves. I really thought, never again but until the moment I had my first bite on my very own wrapped Zhong… I loved it! All my childhood memories being together with my mum overflood me with emotions and joy. The second and third time went much smoother as the process and skillset was apparently still there while I haven’t wrap it for a long time.

You can store the Zhong for a few days in the fridge after it cooled down from the cooking process or store in the freezer for each time consumption. Re-boil in a pan of water or steam the Zhong for about 20-30min. In my opinion, the latter taste better. The structure and flavors remain well contained in the wrap for a delicious snack bite.

Cooking time: approx. 3,5 – 4hrs and serves ~20 portion bites

Ingredients & Tools

  • 40x bamboo leaves, take extra leaves in case some will torn during wrapping
  • 1kg glutinous rice
  • 3x Chinese sausage
  • 10x Chinese/shitake mushroom
  • 8x dried scallops or handful dried shrimps
  • 400-500gr boneless frozen roasted duck (defrost before cutting) or chicken thy fillet with skin. Do not remove the skin because the fat will give some extra aroma. In general, pork belly meat is being used.
  • Optional: 200-300gr mung beans
  • Chinese five spices
  • Soja sauce
  • Rice wine
  • Sugar
  • 2 big bowls
  • 1 big plastic tray or something to put the bamboo leaves on
  • Aluminum foil
  • Sieve
  • Some smaller bowls to put the ingredients in
  • 1 large soup pan
  • Natural (cotton) strings
  • Scissor
  • 1 Tbsp = table spoon
  • 1tsp salt in the soup pan when you start boiling the Zhong

What to do?

  1. ————- Prepare ingredients overnight – 30min ————-
  2. Soak the bamboo leaves in water. This will make them soft for wrapping. You can put the leaves alongside in a big pan
  3. Soak the rice in water in a big bowl.
  4. Soak the mung beans in water in a big bowl.
  5. Soak the scallops or dried shrimps in water in a bowl.
  6. Roasted duck: cut the duck in small chunks or pieces and put them in a bowl.
  7. Chicken thy fillet or pork belly: cut the meat in small chunks or pieces and put them in a bowl.
  8. Add 1 Tbsp rice wine to the meat bowl.
  9. Add 2 tsp sugar.
  10. Sprinkle a bit of soja sauce (2 Tbsp) and add 2 Tbsp Chinese five spices and mix the meat with everything in the bowl.
  11. Cut the mushroom in thick slices.
  12. Cut the sausage in thick slices.
  13. Cover the bowls with aluminium foil and store in the fridge.
  14. The rice and bean bowl can stay on the kitchen table.
  15. ————- Prepare ingredients next day ————-
  16. Take the bamboo leaves out of the water and drain it upright.
  17. Drain the water out from the rice and mung bean bowls. You can use a sieve to catch up the rice/beans.
  18. Drain the water out from the scallops or dried shrimps.
  19. Lay out all the ingredients on the kitchen table.
Top left to right: sticky rice, mung beans, Chinese sausage, dried scallops, shitake mushroom, duck meat, bamboo leaves
  1. ————- Wrapping 45min/1hrs ————-
  2.  Please check out my video on YouTube on how to hold the bamboo leave and how to wrap the Zhong.
  3. Put each wrapped Zhong in the big pan.
  4. ————- Boil for 2hrs ————-
  5. Put 1 tsp salt in the pan.
  6. I pre-boil water in a water cooker at 70C. What temperature is your own preference and is not a must.
  7. Fill the big pan until the last layer of Zhong. Do not overfill, especially not close to the lid edge. While boiling the Zhong, boiled water might overspill from the pan.  
  8. First boil 20-30min on medium heat, then lower the heat with the lid on.
  9. Check from time to time that water is not flooding over or drying out. You can refill water if needed as the Zhong need to be covered in water. The longer you boil, the softer and stickier the rice get.
  10. Take all Zhong out of the pan and let it cool down or start enjoying your hard effort of work 😊
  11. ————- How to eat ? ————-
  12. Cut the string off from the Zhong.
  13. Unwrap the bamboo leaves.
  14. Dip with a little bit soya or spicy sauce for extra flavors.

Let me know if you like my Zhong or share your view on where I can improve my wrapping skill.

Share this:

Japanese braised Kakuni Aubergine

Japanse braised Kakuni aubergine is soft with a savory and spicy flavour. I had this dish in a Japanese restaurant which I cannot forget, and they call it ‘eggplant nanban’. But after searching online for the recipe I got many different results that didn’t match what I ate at the restaurant.

I got so confused with the Japanese sauce or type of cooking methods like nanban, agebitashi and kakuni. After some research on these different cooking styles, here a brief summary on what each means.

Nanban means deep-fried and common accompanied with tartare sauce. Ingredient is usually deep-fried chicken in batter. Agebitashi means deep-fry and soaked in sauce or broth. Kakuni means stewed cube. Ingredient is usually pork belly cut into large cubes.

After some home cooking attempts and the flavours I remembered (well… I went back to the restaurant a few times), the closest style is Kakuni pork belly but then with aubergine. You can eat it cold or warm as appetiser. If you serve the aubergine cold, the flavours are denser and superlicious. For example, you can eat it with rice or as topping in your soup noodles.

Cooking time: approx. 30-45min and serves 5-6 persons

Ingredients & Tools

  • 6x Chinese aubergine
  • 6x Tbsp cooking sake
  • 6x Tbsp mirin
  • 3x Tbsp grated ginger
  • 4.5 Tbsp soy sauce
  • 150cl water
  • Optional: 2-3x thin sliced medium-hot chili
  • Garnish: sesame seeds and/or thin sliced spring onion
  • Olive oil
  • Grater
  • Frying pan 24-28cm diameter, not too big because you want to braise the aubergine in the sauce
  • Cut baking paper to use it as lid on the pan
  • Small medium bowl
  • Big bowl

What to do?

  1. ————- Aubergine ————-
  2. Peel the skin in ‘zebra stripes’ down the aubergine.
  3. Cut aubergine into 2-3cm cubes
  4. Soak the cubes in big bowl for 5min in cold or hand warm water. This is to decrease the bitterness of the aubergine.
  5. ———– Kakuni Sauce ———–
  6. Mix in bowl: 6x Tbsp sake, 6x Tbsp mirin, 4.5 Tbsp soy sauce, 150cl water, 3x Tbsp grated ginger and optional 3x thin sliced chilli
  7. ——— Cooking Process ———
  8. Cut the baking paper round, 3-4cm bigger than the pan size and cut a small whole in the middle.
  9. Heat the pan with a splash of olive oil.
  10. Put the cubes in the pan on low/medium heat.
  11. Pan fry the cubes, turnaround and sprinkle extra olive oil if needed
  12. Once your aubergine gets a bit soft, pour the sauce in the pan.
  13. Let it braise for 20min on low heat and cover the pan with the baking paper lid
  14. Turnaround the cubes from time to time during the cooking process.
  15. When the cubes are soft, near to mushy, it’s time to serve.
  16. Garnish with some sesame seeds and/or with thin sliced spring onion.

I hope you like this homemade Kakuni style aubergine, itadakimasu 😊

Share this:

Terrors of El Caminito del Rey and its magical nature

Terrors of el Caminito del Rey is a divine destination to visit. El Caminito del Rey (The King’s Little Path) is a walkway, pinned along the steep walls of a narrow gorge in El Chorro, near Ardales in the province of Málaga, Spain. This beautiful scenic walk is breath taking and brings more natural sights you can visit for a day. You can find other hiking trails and gorgeous blue lakes for a magical chill out.

How to plan your visit?

I suggest booking your tickets in advance as this attraction can be fully booked for months. We are fortunate with the Covid restrictions and could pay a visit without mass tourism. You can buy tickets online on their official website.

This hike takes about 2 hours in a stretch of 8km without a guided tour (guided is optional) and is a one-way walk from the northern point to the south, ending at the village El Chorro. We took our time in enjoying the nature and there are benches available where you can consume your sandwich at scenery spots.

Route El Caminito del Rey – The King’s Little Path

In general, the hike is an easy combination of walking on flat soil paths, boardwalks and steps. For those being afraid of heights, the boardwalk is about 1,5-meter width having a metal thread fence. Some boards have an opening of ~3cm in between, so flat solid shoes are highly recommended. I believe children under the age of 8 are not allowed to entry, please check the entrance rules on the website. Along the path there are staff keeping an eye on safety and protecting the nature.  

Car parking options:

You can park your car at the starting point or finishing point. If you choose for the latter, you can take the ‘Caminito del Rey bus’ that brings you to the starting point. The bus fare is €1,55 per person for a single trip and drives every 30min during operational hours. You can easily find the bus stop as there are clear signs on the streets. The bus ride takes approx. 20min. If you are lucky, you can park your car for free along the mountain road or find a spot in public parking spaces. Otherwise, you can park at the visitor center for €2 which is close to the starting point.  

How to find the starting point?

This was a mystery for all visitors, both to locals and foreigners. There are no clear route directions, neither clear information on the website on how to walk to the starting point. Take as reference on Google map ‘El Kiosko, Ardales’. This building has a restaurant, bar and a little kiosk and is located along the mountain road. On the right side of the kiosk, there is a tunnel. Pass through the tunnel and turn right on the path. There is a sign with El Caminito del Rey. The walk to the starting point takes approx. 20-30min. At the starting point, you need to queue for your entrance slot. Bear in mind, they do not sell entrance tickets here. Once you pass through the ticket scan, a helmet and a brief introduction on safety & rules will be provided in Spanish or English. What about toilets? No worries, you can find toilet facilities at the queuing area… but be sure you have your own ‘toilet’ paper 😉

I hope you will enjoy this beautiful walk and magical landscape!

Share this:

Tiramisu

Tiramisu, who doesn’t like it? One of my favourite desserts and it is simple to make. Superlicous and fancy for a dinner close out accompanied with a glass of digestive. I learnt making this dessert from an Italian friend. I slightly change the ingredients after making it multiple times and found my own right balance of sweetness and flavours. I hope you like it 🙂

Cooking time: approx. 30min and serves 4 portion

Tip:

  1. Make tiramisu 1 day before serving as it bring more flavour
  2. Replace lady fingers with cantuccini biscuits if you like trying out a different tiramisu texture

Ingredients & Tools

  • 250gr mascarpone
  • 2x egg white
  • 2x cups black coffee
  • 1x pack lady fingers, you might only need 4-5 fingers per glass
  • Cacao powder
  • Cacao spreader or use a sieve
  • Optional liquor: e.g. Tia Maria, Grand Marnier, Amaretto or Pampero rum  
  • Optional topping: e.g. fresh mint leaves, raspberries, blueberries, red berries, or chocolate flakes
  • Mixer
  • 4x water glasses
  • 1x big bowl
  • 1x small bowl
  • Tea spoon
  • Aluminium foil

What to do?

  1. ————- Prepare coffee mix & cream ————-
  2. Make 2 cups of black coffee and let it cool off with a splash of liquor in a small bowl. Be careful with pouring too much liquor as it can bring your tiramisu flavour out of balance. Leave out the liquor for alcohol free tiramisu.
  3. Mix at lowest stand 250gr mascarpone and 2x egg white until well mixed. The mixture might be a little stiff but no need to over-mix.
  4. Bring a splash of liquor into the mixture and continue mixing to a creamy consistence. If consistency is to fluid, you might need to add more mascarpone to get the right balance.
  5. ————- Layer the Glasses ————-
  6. Break the ladyfingers in line with the glass width size from bottom to top when you do each layer.
  7. Dip the fingers in the coffee mix, not too long and not too short. It should absorb enough coffee mix without falling apart. Layer the bottom of the glass first.
  8. Then layer with cream by using a tea spoon and gently smoothen it flat on the fingers.
  9. Spread a thin layer of cacao on the cream.
  10. Repeat step 6 until 9, until the glass is nicely filled upto 1 cm below glass top
  11. Cover aluminium foil on each glass.
  12. Chill the glasses in the fridge for at least 3 hours or overnight.
  13. Before serving spread an extra thin layer of cacao.
  14. Optional: chop mint leaves to fine flakes and sprinkle a little bit on top of the tiramisu. Finishing touch by putting a full mint leave on top.

Share this:

Swedish Finnish Sticks and Raspberry Caves

Don’t know why they call it Finish sticks but they are superlicious origin Swedish pastries. These cookies taste like butter cookies and are very simple to bake. With the same batch of dough I will bake Finnish sticks and will also make Raspberry Caves for some deli variation. If you prefer one type, then you can skip the other ingredients.

Baking time: 20-25min + 30min dough resting time, serves approx. 40-50 cookies

Ingredients & Tools

  • 200gr butter on room temperature
  • 1dl sugar or lesser
  • 1Tblsp vanilla sugar
  • 4,5dl all purpose flour
  • 1x egg
  • Optional: handful pearl sugar
  • Optional: handful crushed almond nuts or any that’s your favourite 
  • Optional: raspberry jam or any jam you like
  • Baking paper and baking tray
  • 1x big bowl
  • 1x baking brush
  • 1x teaspoon
  • 1x fork

What to do?

  1. Put all ingredients in one big bowl. Knead by hand or in a baking machine until its smoothly mixed. By hand it takes between10-15min. 
  2. Split the dough in 2x plastic bags eg sandwich bag and flatten the dough.
  3. Put the bags in the fridge for 30min.
  4. Pre-heat oven on 175°C at conventional heating (oven symbol stripe on top and bottom).
  5. Beat the egg in a small bowl with a fork to use as egg wash for later.
  6. Take the dough out of the fridge. Break a piece and make a ball with your hand palms.
  7. ————- Make Finnish Sticks ————-
  8. Roll the dough on finger thick size strings. 
  9. Cut stick pieces for about 4cm width.
  10. Brush a bit of egg wash over the stick pieces.
  11. Mix the sugar pearls and crushed nuts together (or use one of the two ingredients) and layer on the stick pieces.
  12. Put the sticks on the baking tray.
  13. ————- Make Raspberry Caves ————-
  14. Roll small balls for a cookie size and press a whole in the centre with your dumb.
  15. Scoop a bit jam with the teaspoon in the cookie centre.
  16. Egg wash is not needed here.
  17. Put the cookies on the baking tray.
  18. ————- Cookies in Oven ————-
  19. Bake for 9-10min in the middle of the oven.
  20. Cool off for at least 30min.  

Enjoy your coffee & tea time with your delicious home baked fluffy Swedish cookies 🙂

Share this:

Swedish Cardamom Cinnamon Bun

Do you like coffee & tea time too? Cardamom buns are an indispensable delicacy among Swedish folks for Fika time. Taking your time for a good coffee or tea and have sweet delicacies. This spiced Swedish bun has an intense floral perfume from cardamom seeds, which works its way into the dough during cooking. Another favourite is the cinnamon bun, where the baking process is the same but having cinnamon as key flavour.

This recipe covers both, a mix of cardamom and cinnamon but having cardamom as the key flavour.

Serves approx. 20 buns, baking time 1:30-2 hrs including rising process.

Tips:

  • Flour: use bread flour (hard wheat flower with gluten) or strong flour that contains more protein (tarwemeel/speltmeel) which gives an elastic texture. Do not use all-purpose flour (self-rising flour) as this contains baking powder and is intended for non-yeast recipes e.g. cake and muffins.
  • Yeast: use yeast in the recipe and not baking flour 
  • Cardamom in dough: do not use powder version. If you have pods, then prepare this first in taking out the seeds of the pods as this is quite an effort and time consuming.
  • ————- The Dough ————-
  • Saucepan
  • Whisk
  • Big bowl
  • Mortar & pestle
  • Dough mixer 
  • Kitchen towel
  • Dough roller / rolling pin
  • Knife
  • Baking paper, baking tray
  • 2,5 dl milk
  • 25 gram yeast
  • 1 Tbsp fresh ground cardamom seeds
  • 450-500 gram (7dl) bread flour 
  • 75 gram butter on room temperature  
  • 1 dl sugar
  • ½ tsp salt
  • ————- The Filling ————-
  • Small bowl
  • Fork
  • 100 gram butter on room temperature, butter needs to be soft
  • 1dl sugar
  • 1 Tbsp fresh ground cardamom seeds
  • 1 Tbsp cinnamon powder
  • ————- Topping ————-
  • Baking / pastry brush
  • 2x small bowls
  • 1x egg wash
  • ½ dl sugar
  • ½ dl water
  • ½ Tbsp vanilla sugar
  • Mix 2 tsp cinnamon and 2 tsp cardamom powder
  • Optional: 1dl pearl sugar or chopped almonds

What to do?

  1. ————- The Dough ————-
  2. Warm up 2,5 dl milk in a saucepan to finger warm temperature.
  3. Crumble 25gr yeast into the pan, whisk until it dissolves in the milk and pour the milk over in the big bowl.
  4. Grind 1 Tbsp cardamom seeds with the mortar & pestle.
  5. Add the grinded cardamom, 1dl sugar, 450gr baking flour and 75gr butter into the milk bowl.
  6. Mix the mixture for at least 15min until the dough gets elastic. Halfway mixing the flower, add ½ tsp salt and continue mixing. Add a bit more flower if dough is too wet.
  7. Cover the bowl with a kitchen towel and let it rest for at least 40min. The dough will rise about double its size.  
  8. ————- The Filling ————-
  9. Mix 100gr butter, 1dl sugar, 1 Tbsp ground cardamom and 1 Tbsp cinnamon powder with a fork. The consistent is difficult to mix in the beginning but when the butter softens, it will make it much easier.
  10. ————- Prepare Dough ————-
  11. Prepare baking trays, having baking paper on the bottom.
  12. The dough is ready when it bounces back by slapping on the dough with your hand palm or fingers. Place the dough on a flat and clean surface. Roll it out to a rectangular shape by using a dough roller. 
  13. Spread the filling in lengthwise on one half over the dough and fold the dough in half lengthwise.
  14. Gently, press the dough down so that the folded dough sticks together.
  15. Slice the dough in 1,5cm strips.
  16. Take one strip and twist it. Lay one end on the surface, then roll the strip over the end and place the other end at the bottom of the bun. See video on the ‘How’ at the bottom of this article. Place the bun on the baking tray.
  17. Repeat with the stripes and twists until dough is finished.
  18. Cover the bun tray with a towel and let it rest for 30min.
  19. Pre-heat the oven on 225°C.
  20. ————- Topping ————-
  21. While the buns are resting, make the sugar syrup. Put ½ dl sugar, ½dl water, ½ Tbsp vanilla sugar in a saucepan. Let it simmer until the sugar is dissolved.
  22. Whisk the egg for the egg wash (beaten egg + little water or milk).
  23. Brush the buns with egg wash.
  24. Sprinkle a little bit of the cinnamon & cardamom powder mix on each bun
  25. Optional: sprinkle a little bit of pearl sugar or chopped almonds on each bun.
  26. ————- Finally ————-
  27. Bake the buns in the middle of the oven for approx. 8-10min until the buns are having a golden glow.
  28. When you take the buns out from the oven, immediately brush each bun with a little bit of sugar syrup. The liquid will evaporate and don’t brush too much as you don’t want soggy buns. The syrup prevents having dry buns when they cool off.
  29. Let the buns cool off on the rack.
How to curl your bun

Enjoy your buns with Swedish Fika Time 😋☕️

Share this: