Japanese braised Kakuni Aubergine

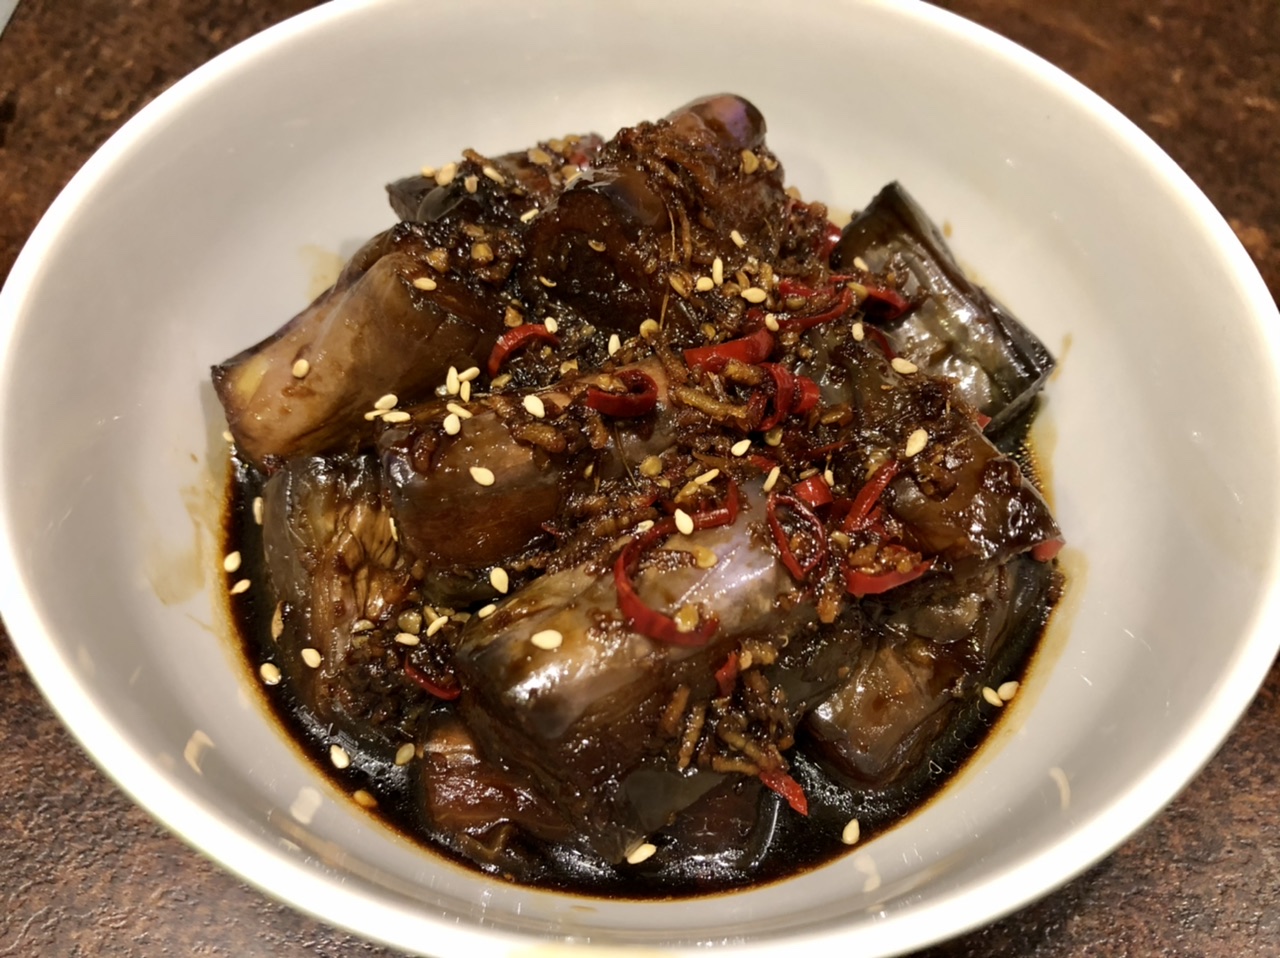
Japanse braised Kakuni aubergine is soft with a savory and spicy flavour. I had this dish in a Japanese restaurant which I cannot forget, and they call it ‘eggplant nanban’. But after searching online for the recipe I got many different results that didn’t match what I ate at the restaurant.

I got so confused with the Japanese sauce or type of cooking methods like nanban, agebitashi and kakuni. After some research on these different cooking styles, here a brief summary on what each means.

Nanban means deep-fried and common accompanied with tartare sauce. Ingredient is usually deep-fried chicken in batter. Agebitashi means deep-fry and soaked in sauce or broth. Kakuni means stewed cube. Ingredient is usually pork belly cut into large cubes.

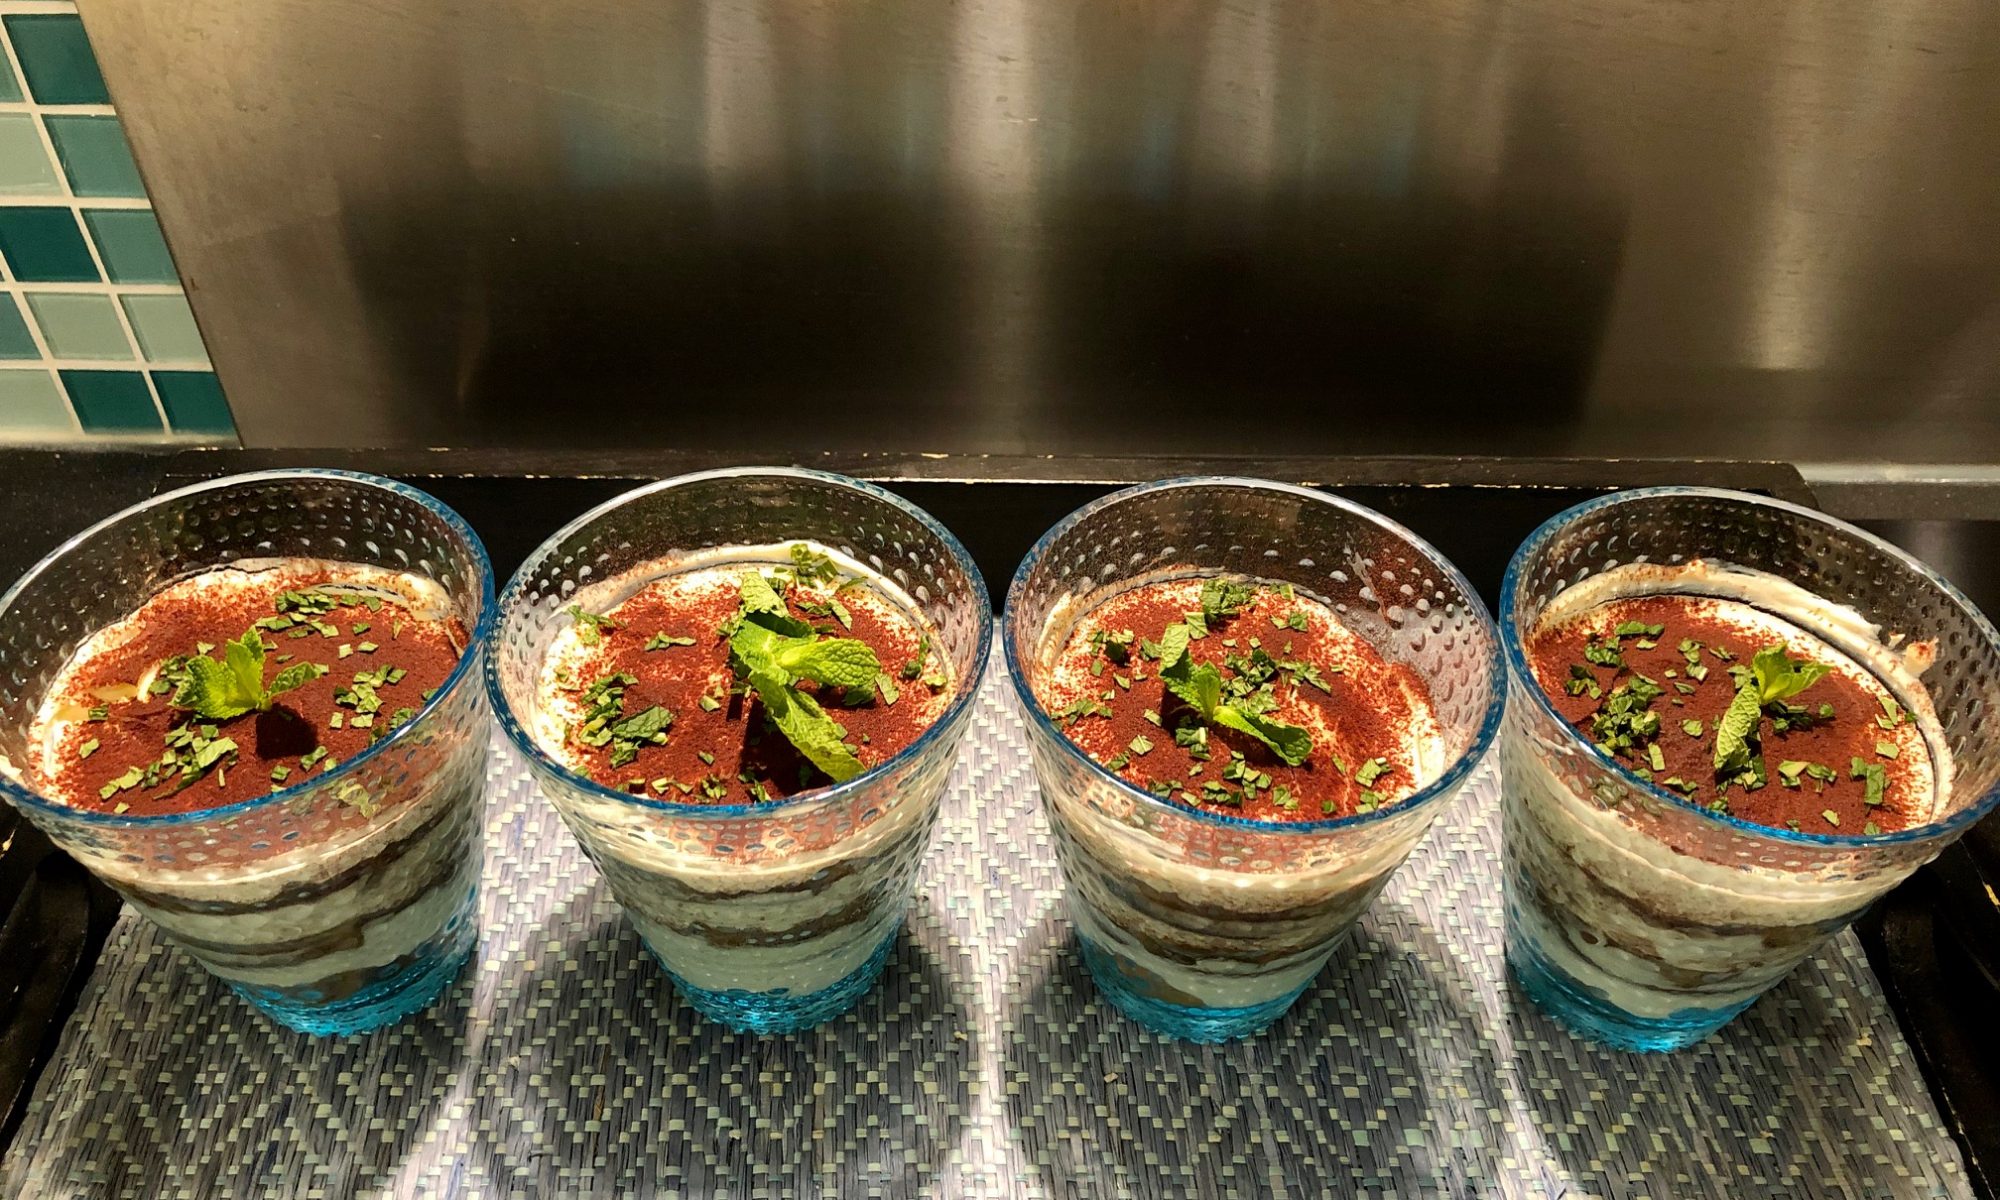
After some home cooking attempts and the flavours I remembered (well… I went back to the restaurant a few times), the closest style is Kakuni pork belly but then with aubergine. You can eat it cold or warm as appetiser. If you serve the aubergine cold, the flavours are denser and superlicious. For example, you can eat it with rice or as topping in your soup noodles.

Cooking time: approx. 30-45min and serves 5-6 persons

Ingredients & Tools

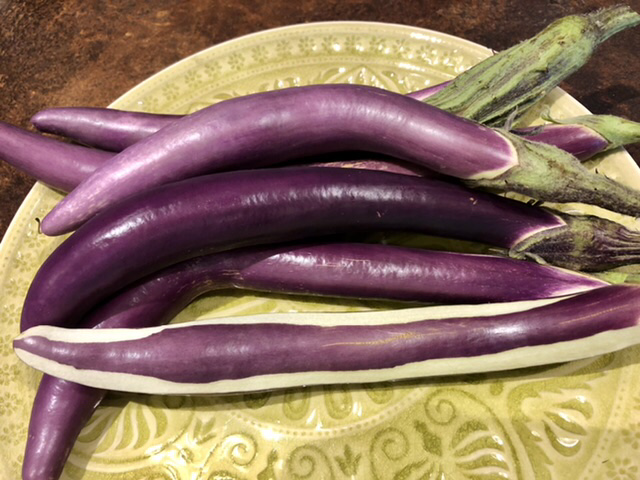
  • 6x Chinese aubergine
  • 6x Tbsp cooking sake
  • 6x Tbsp mirin
  • 3x Tbsp grated ginger
  • 4.5 Tbsp soy sauce
  • 150cl water
  • Optional: 2-3x thin sliced medium-hot chili
  • Garnish: sesame seeds and/or thin sliced spring onion
  • Olive oil
  • Grater
  • Frying pan 24-28cm diameter, not too big because you want to braise the aubergine in the sauce
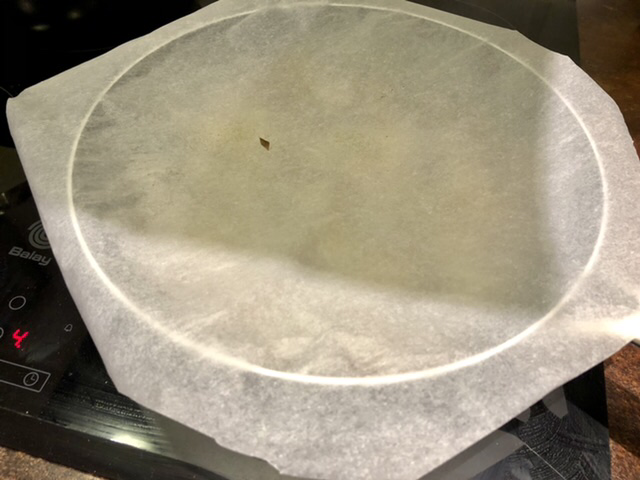
  • Cut baking paper to use it as lid on the pan
  • Small medium bowl
  • Big bowl

What to do?

  1. ————- Aubergine ————-
  2. Peel the skin in ‘zebra stripes’ down the aubergine.
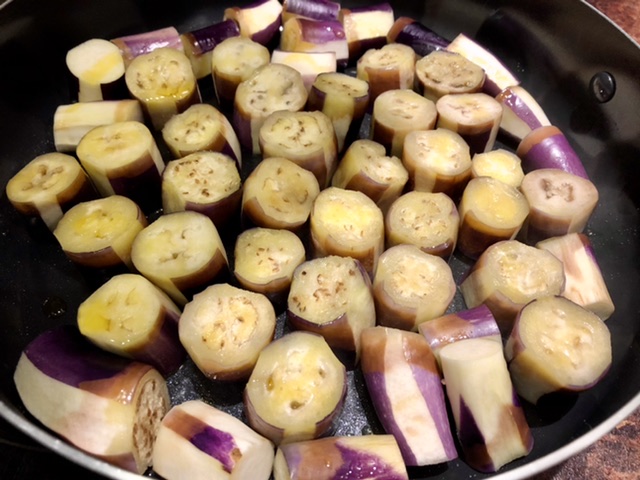
  3. Cut aubergine into 2-3cm cubes
  4. Soak the cubes in big bowl for 5min in cold or hand warm water. This is to decrease the bitterness of the aubergine.
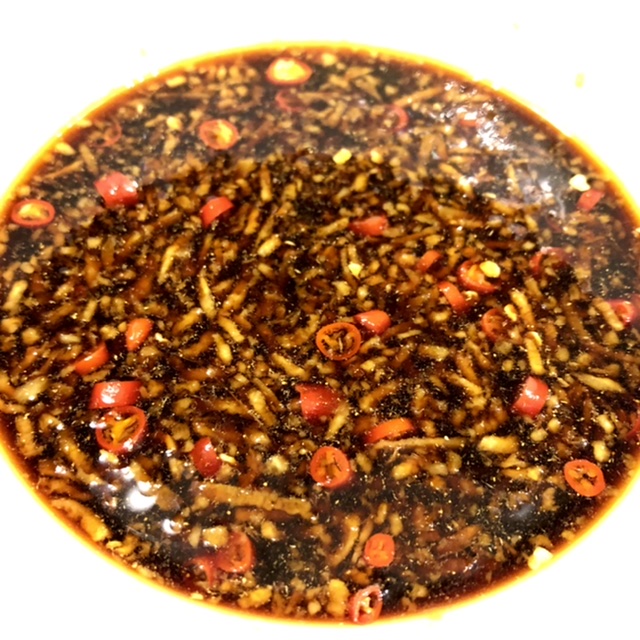
  5. ———– Kakuni Sauce ———–
  6. Mix in bowl: 6x Tbsp sake, 6x Tbsp mirin, 4.5 Tbsp soy sauce, 150cl water, 3x Tbsp grated ginger and optional 3x thin sliced chilli
  7. ——— Cooking Process ———
  8. Cut the baking paper round, 3-4cm bigger than the pan size and cut a small whole in the middle.
  9. Heat the pan with a splash of olive oil.
  10. Put the cubes in the pan on low/medium heat.
  11. Pan fry the cubes, turnaround and sprinkle extra olive oil if needed
  12. Once your aubergine gets a bit soft, pour the sauce in the pan.
  13. Let it braise for 20min on low heat and cover the pan with the baking paper lid
  14. Turnaround the cubes from time to time during the cooking process.
  15. When the cubes are soft, near to mushy, it’s time to serve.
  16. Garnish with some sesame seeds and/or with thin sliced spring onion.

I hope you like this homemade Kakuni style aubergine, itadakimasu 😊

Share this:

Tiramisu

Tiramisu, who doesn’t like it? One of my favourite desserts and it is simple to make. Superlicous and fancy for a dinner close out accompanied with a glass of digestive. I learnt making this dessert from an Italian friend. I slightly change the ingredients after making it multiple times and found my own right balance of sweetness and flavours. I hope you like it 🙂

Cooking time: approx. 30min and serves 4 portion

Tip:

  1. Make tiramisu 1 day before serving as it bring more flavour
  2. Replace lady fingers with cantuccini biscuits if you like trying out a different tiramisu texture

Ingredients & Tools

  • 250gr mascarpone
  • 2x egg white
  • 2x cups black coffee
  • 1x pack lady fingers, you might only need 4-5 fingers per glass
  • Cacao powder
  • Cacao spreader or use a sieve
  • Optional liquor: e.g. Tia Maria, Grand Marnier, Amaretto or Pampero rum  
  • Optional topping: e.g. fresh mint leaves, raspberries, blueberries, red berries, or chocolate flakes
  • Mixer
  • 4x water glasses
  • 1x big bowl
  • 1x small bowl
  • Tea spoon
  • Aluminium foil

What to do?

  1. ————- Prepare coffee mix & cream ————-
  2. Make 2 cups of black coffee and let it cool off with a splash of liquor in a small bowl. Be careful with pouring too much liquor as it can bring your tiramisu flavour out of balance. Leave out the liquor for alcohol free tiramisu.
  3. Mix at lowest stand 250gr mascarpone and 2x egg white until well mixed. The mixture might be a little stiff but no need to over-mix.
  4. Bring a splash of liquor into the mixture and continue mixing to a creamy consistence. If consistency is to fluid, you might need to add more mascarpone to get the right balance.
  5. ————- Layer the Glasses ————-
  6. Break the ladyfingers in line with the glass width size from bottom to top when you do each layer.
  7. Dip the fingers in the coffee mix, not too long and not too short. It should absorb enough coffee mix without falling apart. Layer the bottom of the glass first.
  8. Then layer with cream by using a tea spoon and gently smoothen it flat on the fingers.
  9. Spread a thin layer of cacao on the cream.
  10. Repeat step 6 until 9, until the glass is nicely filled upto 1 cm below glass top
  11. Cover aluminium foil on each glass.
  12. Chill the glasses in the fridge for at least 3 hours or overnight.
  13. Before serving spread an extra thin layer of cacao.
  14. Optional: chop mint leaves to fine flakes and sprinkle a little bit on top of the tiramisu. Finishing touch by putting a full mint leave on top.

Share this:

Swedish Finnish Sticks and Raspberry Caves

Don’t know why they call it Finish sticks but they are superlicious origin Swedish pastries. These cookies taste like butter cookies and are very simple to bake. With the same batch of dough I will bake Finnish sticks and will also make Raspberry Caves for some deli variation. If you prefer one type, then you can skip the other ingredients.

Baking time: 20-25min + 30min dough resting time, serves approx. 40-50 cookies

Ingredients & Tools

  • 200gr butter on room temperature
  • 1dl sugar or lesser
  • 1Tblsp vanilla sugar
  • 4,5dl all purpose flour
  • 1x egg
  • Optional: handful pearl sugar
  • Optional: handful crushed almond nuts or any that’s your favourite 
  • Optional: raspberry jam or any jam you like
  • Baking paper and baking tray
  • 1x big bowl
  • 1x baking brush
  • 1x teaspoon
  • 1x fork

What to do?

  1. Put all ingredients in one big bowl. Knead by hand or in a baking machine until its smoothly mixed. By hand it takes between10-15min. 
  2. Split the dough in 2x plastic bags eg sandwich bag and flatten the dough.
  3. Put the bags in the fridge for 30min.
  4. Pre-heat oven on 175°C at conventional heating (oven symbol stripe on top and bottom).
  5. Beat the egg in a small bowl with a fork to use as egg wash for later.
  6. Take the dough out of the fridge. Break a piece and make a ball with your hand palms.
  7. ————- Make Finnish Sticks ————-
  8. Roll the dough on finger thick size strings. 
  9. Cut stick pieces for about 4cm width.
  10. Brush a bit of egg wash over the stick pieces.
  11. Mix the sugar pearls and crushed nuts together (or use one of the two ingredients) and layer on the stick pieces.
  12. Put the sticks on the baking tray.
  13. ————- Make Raspberry Caves ————-
  14. Roll small balls for a cookie size and press a whole in the centre with your dumb.
  15. Scoop a bit jam with the teaspoon in the cookie centre.
  16. Egg wash is not needed here.
  17. Put the cookies on the baking tray.
  18. ————- Cookies in Oven ————-
  19. Bake for 9-10min in the middle of the oven.
  20. Cool off for at least 30min.  

Enjoy your coffee & tea time with your delicious home baked fluffy Swedish cookies 🙂

Share this:

Swedish Cardamom Cinnamon Bun

Do you like coffee & tea time too? Cardamom buns are an indispensable delicacy among Swedish folks for Fika time. Taking your time for a good coffee or tea and have sweet delicacies. This spiced Swedish bun has an intense floral perfume from cardamom seeds, which works its way into the dough during cooking. Another favourite is the cinnamon bun, where the baking process is the same but having cinnamon as key flavour.

This recipe covers both, a mix of cardamom and cinnamon but having cardamom as the key flavour.

Serves approx. 20 buns, baking time 1:30-2 hrs including rising process.

Tips:

  • Flour: use bread flour (hard wheat flower with gluten) or strong flour that contains more protein (tarwemeel/speltmeel) which gives an elastic texture. Do not use all-purpose flour (self-rising flour) as this contains baking powder and is intended for non-yeast recipes e.g. cake and muffins.
  • Yeast: use yeast in the recipe and not baking flour 
  • Cardamom in dough: do not use powder version. If you have pods, then prepare this first in taking out the seeds of the pods as this is quite an effort and time consuming.
  • ————- The Dough ————-
  • Saucepan
  • Whisk
  • Big bowl
  • Mortar & pestle
  • Dough mixer 
  • Kitchen towel
  • Dough roller / rolling pin
  • Knife
  • Baking paper, baking tray
  • 2,5 dl milk
  • 25 gram yeast
  • 1 Tbsp fresh ground cardamom seeds
  • 450-500 gram (7dl) bread flour 
  • 75 gram butter on room temperature  
  • 1 dl sugar
  • ½ tsp salt
  • ————- The Filling ————-
  • Small bowl
  • Fork
  • 100 gram butter on room temperature, butter needs to be soft
  • 1dl sugar
  • 1 Tbsp fresh ground cardamom seeds
  • 1 Tbsp cinnamon powder
  • ————- Topping ————-
  • Baking / pastry brush
  • 2x small bowls
  • 1x egg wash
  • ½ dl sugar
  • ½ dl water
  • ½ Tbsp vanilla sugar
  • Mix 2 tsp cinnamon and 2 tsp cardamom powder
  • Optional: 1dl pearl sugar or chopped almonds

What to do?

  1. ————- The Dough ————-
  2. Warm up 2,5 dl milk in a saucepan to finger warm temperature.
  3. Crumble 25gr yeast into the pan, whisk until it dissolves in the milk and pour the milk over in the big bowl.
  4. Grind 1 Tbsp cardamom seeds with the mortar & pestle.
  5. Add the grinded cardamom, 1dl sugar, 450gr baking flour and 75gr butter into the milk bowl.
  6. Mix the mixture for at least 15min until the dough gets elastic. Halfway mixing the flower, add ½ tsp salt and continue mixing. Add a bit more flower if dough is too wet.
  7. Cover the bowl with a kitchen towel and let it rest for at least 40min. The dough will rise about double its size.  
  8. ————- The Filling ————-
  9. Mix 100gr butter, 1dl sugar, 1 Tbsp ground cardamom and 1 Tbsp cinnamon powder with a fork. The consistent is difficult to mix in the beginning but when the butter softens, it will make it much easier.
  10. ————- Prepare Dough ————-
  11. Prepare baking trays, having baking paper on the bottom.
  12. The dough is ready when it bounces back by slapping on the dough with your hand palm or fingers. Place the dough on a flat and clean surface. Roll it out to a rectangular shape by using a dough roller. 
  13. Spread the filling in lengthwise on one half over the dough and fold the dough in half lengthwise.
  14. Gently, press the dough down so that the folded dough sticks together.
  15. Slice the dough in 1,5cm strips.
  16. Take one strip and twist it. Lay one end on the surface, then roll the strip over the end and place the other end at the bottom of the bun. See video on the ‘How’ at the bottom of this article. Place the bun on the baking tray.
  17. Repeat with the stripes and twists until dough is finished.
  18. Cover the bun tray with a towel and let it rest for 30min.
  19. Pre-heat the oven on 225°C.
  20. ————- Topping ————-
  21. While the buns are resting, make the sugar syrup. Put ½ dl sugar, ½dl water, ½ Tbsp vanilla sugar in a saucepan. Let it simmer until the sugar is dissolved.
  22. Whisk the egg for the egg wash (beaten egg + little water or milk).
  23. Brush the buns with egg wash.
  24. Sprinkle a little bit of the cinnamon & cardamom powder mix on each bun
  25. Optional: sprinkle a little bit of pearl sugar or chopped almonds on each bun.
  26. ————- Finally ————-
  27. Bake the buns in the middle of the oven for approx. 8-10min until the buns are having a golden glow.
  28. When you take the buns out from the oven, immediately brush each bun with a little bit of sugar syrup. The liquid will evaporate and don’t brush too much as you don’t want soggy buns. The syrup prevents having dry buns when they cool off.
  29. Let the buns cool off on the rack.
How to curl your bun

Enjoy your buns with Swedish Fika Time 😋☕️

Share this:

Swedish Midsummer Strawberry Cake

In Sweden, midsummer is a cherished tradition that starts every year on the 3rdFriday of June on Midsummer Eve. This ritual involves flowers in the hair, dancing around a pole, singing Swedish songs while drinking schnapps and having various midsummer foods on the table e.g. pickled herring (sil) with potatoes, gravlax (salmon), sour cream, dille, knäckebröd. Today, it’s more about food and drinking with family and/or friends 😊

One of the not-to-be-missed festive food is the Swedish jordgubbstårta. This is a summer cake filled with vanilla cream and strawberries. It is quite an effort but I’m sure you will love it! Tip: make the cake 1 day before and decorate next day, follow steps 1 until 29.

Serves approx. 12 slices, cooking time 1:30 – 2hrs including cool down process 

Ingredients

  • ————- Cake ————-
  • Butter and breadcrumbs (NL paneer meel) for the springform pan Ø 22cm 
  • Baking paper
  • Big and Medium bowl
  • Hand/electrical mixer
  • 1dl all purpose flower
  • 1dl potato starch or corn starch 
  • 1,5 tsp baking powder
  • 4 eggs
  • 1½ dl sugar 
  • ————- Vanilla Custard ————-
  • Saucepan
  • Small bowl
  • 2 egg yolks
  • 2,5 Tbsp sugar 
  • 2 Tbsp potato starch or corn starch 
  • 1dl standard milk
  • 1dl whipping cream
  • 1 vanilla pod or 2 tsp vanilla sugar
  • ————- Strawberry Filling ————-
  • 400-500gr strawberries or forest fruit which brings a flourish variation on your tasty pallets (frozen fruit is possible)
  • 2 Tbsp sugar 
  • ½ lemon, zest and juice
  • ————- Topping Decoration ————-
  • 4dl whipping cream 
  • 400gr strawberries
  • Optional: 1½ cup chopped roasted hazelnuts or other mixed nuts to your preference

What to do?

  1. ————- Cake ————-
  2. Pre-heat oven on fan function at 190°– 200°C 
  3. Cover the bottom of spring form with baking paper 
  4. Grease the sides of the pan with butter
  5. Coat the pan with breadcrumbs
  6. In medium bowl: add 1dl flour, 1dl potato starch and 1,5 tsp baking soda. Stir until well mixed.
  7. In big bowl: whisk 4 eggs and 1½ dl sugar with hand mixer for 5-10min until the batter is white and fluffy
  8. Add mixed flower little by little into the egg mixture and stir well. 
  9. Pour the mixture into the baking pan.
  10. Bake for 20min in the oven 190° on the middle level until its golden brown. If cake doesn’t get brown, increase oven heat to 200°C. 
  11. Prick a wooden stick in the cake and check if the stick is clean and dry.
  12. Once the cake is ready, take it out of the oven and let it cool down in the pan.
  13. ————- Vanilla Custard ————-
  14. Add 2 yolks, 2.5Tbsp sugar, 2Tbsp potato starch, 1dl milk, 1dl cream in the saucepan.
  15. Scrape the seeds out from the vanilla pod and add into the saucepan. 
  16. Cook on low heat and whisk until sauce gets thick.
  17. Once it gets thick, pour the sauce in a bowl. In case you use vanilla sugar instead of vanilla pod, then add and stir 2tsp vanilla sugar in the bowl.
  18. Let the sauce cool down.
  19. ————- Strawberry Filling ————-
  20. Remove stalks of 400-500gr strawberries and cut it small pieces. Put the berries in a bowl. In case you use frozen fruit, heat it up in a small pan.
  21. Add 2Tbsp sugar, ½ lemon zest and its juice. Stir all ingredients (let it cool down when you heat the frozen fruit).
  22. Crush the berries slightly until you have a jam consistency with chunks of berries
  23. ————- Decorate Cake ————-
  24. Cut the cake in 2 or 3 layers, whatever you feel comfortable with and the cake allows to.
  25. Spread the vanilla custard on the 1stlayer of the cake. On the 2ndlayer, spread the berries filling and add thin layer custard on top of the berries. Put the cake top above the berries. 
  26. Tip: store the cake with custard filling in the fridge overnight and decorate the cake next day. This will make the cake moisty with full berry flavour. Put the springform ring around the cake, and layer 1 kitchen paper on the cake top, and then cover with aluminium foil. In case you want to make the cake in 1 day, put the cake in the fridge while you prepare next steps or put it longer in the fridge in letting the cream stiff up.
  27. Optional: chop 1½ cup roasted hazelnuts to decorate the sides of the cake at step 31.
  28. Remove stalks of 400gr strawberries remove and cut in slices or decorate cake with uncut strawberries but note that slicing the cake would be more challenging.
  29. Whip 4dl cream until it gets thick.
  30. Coat the sides and the cake top with cream.
  31. Decorate the sides with chopped roasted hazelnuts.
  32. Lastly, decorate the cake top with sliced strawberries. Start layering slices on the outer circle first, then layer by layer to the center of the cake. 

Smaklig måltid!

Swedish jordgubbstårta

Share this:

Serbian Style Stuffed Tomato

Another virtual get-together dinner and this time no take-away but cooking a Serbian dish. Original recipe is with stuffed paprika but as I have paprika allergy, a Serbian friend advised to replace with giant tomatoes. My friends will cook paprika and I got 3 tomatoes. Third one is just in case if two is not enough 😁

Serves 1P and cooking time 1:30-2hrs

Ingredients

  • 3x giant tomatoes (or 2x paprika/bell pepper/pepper)
  • 1x shallot chopped
  • 2x garlic cloves pressed
  • 1x carrot chopped 
  • 1x slice bacon (about 70gr) – cut in pieces and remove fatty parts
  • 1Tbsp olive oil
  • 300gr ground beef or mix 200gr ground beef + 100gr ground pork. Personally, I like to avoid too much pork. As there is bacon, I took only beef.
  • 1x bay leave
  • Salt to taste
  • ½ cup white rice
  • ½ cup white wine
  • ½ cup water
  • (When you cook with paprika, dice 1x tomato. Pulp and all will be used for sauce) 
  • ————- Kitchen Tools ————- 
  • Medium measure spoon to hollow tomato, edges are sharper then a regular table spoon.
  • 1 medium bowl
  • 1x deep oven dish
  • 1x frying pan
  • Aluminium foil

What to do?

  1. Pre-heat oven on fan 230°C
  2. Cut the top off the tomato. Keep the top for later to use as lid on tomato.
  3. Scoop the pulp and seeds out in a bowl by using a knife and spoon. Keep the pulp for later.
  4. Chop 1 shallot, chop 1 carrot and press 2 garlic cloves.
  5. Cut bacon in small pieces.
  6. Heat pan with 1Tbsp olive oil. Add bacon.
  7. When bacon starts to cook, add shallot, carrot and garlic.
  8. Stir for a few minutes.
  9. Add 300gram beef, 1 bay leave and salt to taste.
  10. Stir the meat until small lumps.
  11. When meat looks cooked, add ½ cup rice. Mix together for a 5min.
  12. Switch off cooking plate.
  13. Remove bay leave.
  14. Fill up the tomatoes and close it with the tomato top.
  15. Put tomatoes in oven dish.
  16. ————- Sauce ————-
  17. Re-use the frying pan without washing.
  18. Just remove remaining food in pan.
  19. Turn heat on. Add ½ cup wine, ½ cup water and add 1 cup tomato pulp. I store the leftover pulp in the fridge for something else e.g. soup, pasta sauce.
  20. When everything is mixed, pour the sauce in oven dish. Ideally is to bath the tomatoes in ~3cm sauce. If not enough sauce, then add some water.
  21. Cover the dish with aluminium foil. Put dish for 45min in oven.
  22. Take dish out and keep oven on.
  23. Remove foil and pour sauce over tomatoes. If there is too much liquid in the dish, then take some liquid out until ~1cm for the tomatoes too bath in. 
  24. Cook for another 15min in oven without foil.

Finally: serve tomatoes with a simple salad on the side.

My tomatoes got very soft and burst a bit open because of the long cooking time. You need this time in letting the rice cook and letting the flavours flourish.

Prijatno! Hajde, navali! Dobar apetit!

Share this:

Borscht soup with meat

In this covid19 period and having social distancing to keep everybody safe…. me, my partner and his friends started with a weekly virtual dinner meet-up. We mutual agree on a recipe to cook and at lazy times we do delivery/takeaway in a particular kitchen. 

Today, we all cook the famous Ukrainian/Russian beetroot soup, borscht. Each of us makes his own version of borscht. One having meat, with shrimps (my partner’s style) or vegetarian.

Naturally, I go for the original borscht with meat. How can it not go with meat, right? This is my 1sttime cooking borscht and I will never forget this delicious soup when I ate this in Russia. I really hope I will get close to this memorable taste.

The result was surprisingly good, almost close to the one I had in Russia. Maybe next time, when I try again 🙂

Serves 4P and cooking time 1:30-2hrs

Ingredients

  • 300gr unboned stew meat or veal shin (NL: kalfsschenkel) – cut meat in pieces
  • 1L cold water
  • ½ Tbsp salt + more at taste 
  • 2 medium beetroot – peel and grate or cut in bite size pieces
  • 2 Tbsp olive oil2 Tbsp vinegar
  • ½ Tbsp sugar
  • 1 Tbsp tomato sauce 1 shallot – fine dice
  • ½ Tbsp butter1 medium carrot – peel and cut in bite size or grate
  • 3 medium potatoes –peel and cut in bite size
  • 1 tomato – optional peeled and cut in dices
  • 1 bay leave
  • ½ tsp pepper 
  • 10gr dille (handful) – chop + fresh sprigs for garnish
  • 1 clove garlic – pressed
  • Sour cream – optional for garnish 

Kitchen Tools

  • Large soup pot
  • Food processor
  • Large bowl
  • Frying pan

What to do?

1) Wash meat in cold water and cut in pieces. Place in a large soup pot with 1 liter cold water +  ½ Tbsp salt. Bring it to boil and remove the foam while it boils. Keep doing this until there is no foam crud as this will be your broth. Then lower the heat and boil for 45min-1hr. Regularly remove crud if needed.

.

2) Grate beet in food processor or cut in bite size. Place the beet in a large bowl and add 2 Tbsp olive oil + 2Tbsp vinegar. Stir well and sauté 5min in pan. Then lower the heat, add ½ Tbsp sugar + 1 Tbsp tomato sauce. Stir well for 10min. Place the beet back in the bowl and set aside.

3) Use the same pan, no need to wash it. Sauté the onion in ½ Tbsp butter for 2min. Add carrot and sauté for another 5 min or until it gets soft. Then add into big bowl of beet.

4) Once the meat has been cooked for minimum 45min, add the diced potatoes in the soup pan and cook for 10min. Then add sautéed beet, onions, carrot and diced tomatoes. Cook for another 10min.

5) Add 1 bay leave, ½ tsp pepper and salt to taste.

6) Add chopped dille and pressed garlic in soup pan. Stir well and cover with lid. Cook the soup in low heat for 20min.

Finally: serve the soup hot and garnish with fresh dille sprigs and a little bit of sour cream (optional).

Borscht Soup with Meat

Eet Smakelijk!

Share this:

Walnut Banana Bread

I hope you are doing well in this bizarre and impactful period, in which everybody still has to find his or her way of life in this pandemic outbreak. I have been isolating myself for weeks. I work from home, do my necessary errands every 4-5 days, cook daily three meals, sometimes taking some fresh air and spend lots of time with my savior mister Netflix.

To kill my isolation time with more fun, I baked a delicious walnut banana bread for my tea breaks. Shopping was not required as I had all the ingredients at home. So let’s have some Fika-Time if you are up for baking. 

Baking time approx. 1hrs and serves 6-8 slices.

Tools & Ingredients

  • 1 sheet baking paper
  • 3 bowls (large, medium and small)
  • 1 cake dish ~28cm
  • Whisk (electrical or manual will do fine as well)
  • Wooden chopstick or long bamboo pick
  • 200 gram all purpose flower
  • ½ tsp baking soda
  • ½ tsp baking powder
  • 115 gram unsalted soft butter (or melt the butter)
  • 110 gram brown sugar
  • 2 eggs
  • 1 Tbsp vegetable oil
  • 1 tsp vanilla powder or pure vanilla extract
  • 4 (half) ripe bananas
  • ¾ coffee cup crushed unsalted walnuts

What to do?

  1. Cover the bottom of your baking dish with the baking paper and along sides.
  2. Pre-heat oven on fan grill function at 175°C.
  3. Whisk 200gr flower + ½ tsp baking soda + ½ tsp baking powder all together in a bowl.
  4. Whisk in a separate big bowl 115gr 110gr melted butter + sugar until well blended.
  5. Add 2 eggs + 1Tbsp vegetable oil + tsp vanilla powder into the butter/sugar bowl and whisk until well blended.
  6. Mash all 4 bananas fine with a fork and mix into the egg mixture.
  7. Add the flower mix to the egg mixture by intervals and stir it until well blended.
  8. Mix ½ cup walnuts to the mixture.
  9. Pour the batter and flatten the mixture into the cake dish. 
  10. Spread remaining walnuts on top of cake dish.
  11. Put the dish in the middle oven section on fan grill function at 175°C for 45 min.
  12. Prick the wooden pick into the center of the bread and see if it comes out dry. If wood comes out sticky and moisty, then bake the cake a bit extra longer and check again after 10-15min.

Finally: let the bread cool down for 15-20min outside the oven before serving for tea.

Enjoy your Fika-Time ☕️

Share this: